Sticky Coconut Cake – Easy & Delicious Recipe
Sticky Coconut Cake is more than just a dessert; it’s a warm hug in edible form, a tropical escape that transports you with every bite. What is it about this humble yet magnificent cake that has us all so utterly smitten? Perhaps it’s the non-intoxicating aroma that fills the kitchen as it bakes, a fragrant blend of toasted coconut and sweet vanilla. Or maybe it’s the irresistible texture – that perfect balance of a tender, moist crum extractb giving way to a gorgeously gooey, caramel-like topping. This isn’t just any cake; the magic of this Sticky Coconut Cake lies in its duality: a comforting, familiar base elevated by the exotic allure of coconut, all bound together by a luscious, golden glaze that promises pure indulgence. It’s the kind of treat that’s perfect for sharing with loved ones, or for those moments when you just need a little bit of sweet sunshine for yourself.
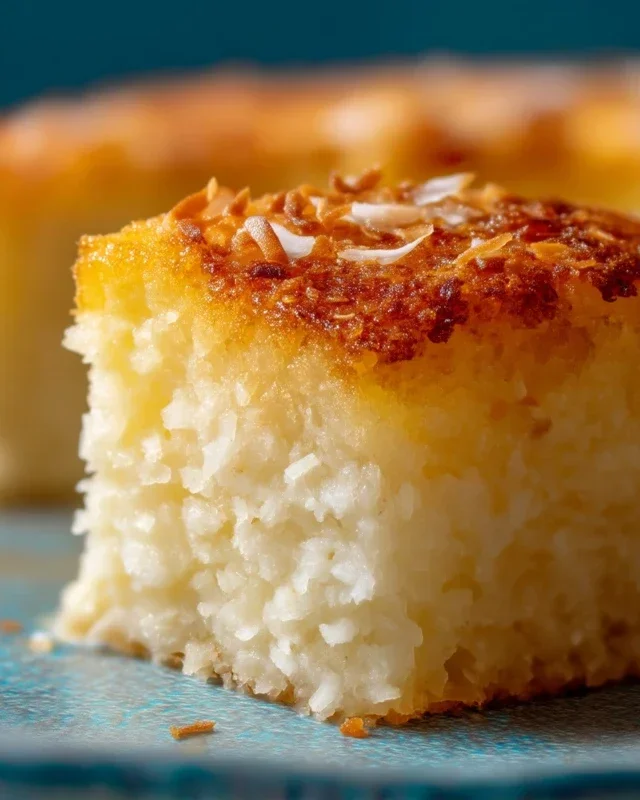
Sticky Coconut Cake
There’s something undeniably comforting about a warm, fragrant slice of cake, especially when it’s infused with the tropical sweetness of coconut. Today, we’re diving into the world of sticky, delightful cakes with this recipe for a Sticky Coconut Cake that’s surprisingly simple to make and utterly delicious. This isn’t your average airy sponge; this cake boasts a wonderfully chewy, dense texture that’s incredibly satisfying. It’s perfect for a sweet treat with a cup of tea, a delightful dessert after a meal, or even as a special breakfast indulgence. The rich coconut flavor is prominent, enhanced by the creamy texture that comes from using full-fat coconut milk. I love how the glutinous rice flour gives it that characteristic sticky chew, making each bite a little adventure.
Ingredients:
Cooking Instructions
Now, let’s get down to the business of creating this delightful Sticky Coconut Cake. Don’t be intimidated by the different components; it’s a straightforward process that yields fantastic results.
Step 1: Preparing the Egg Yolks and Wet Ingredients
First, let’s get our wet ingredients ready. In a large bowl, take your 2 egg yolks and set them aside. In a separate medium saucepan, combine the 2¼ cups of full-fat canned coconut milk with the 1¼ cup of granulated sugar. Place this saucepan over medium heat. We’re going to gently heat this mixture, stirring constantly, until the sugar has completely dissolved. It’s important not to boil this mixture; we just want it warm enough to dissolve the sugar. Once the sugar is dissolved, remove the saucepan from the heat.
Next, we’ll incorporate the egg yolks into this warm coconut milk mixture. Take about ½ cup of the warm coconut milk mixture and slowly whisk it into the 2 egg yolks. This process is called tempering and it prevents the egg yolks from scrambling when you add them to the larger batch of warm liquid. Once the yolks are well incorporated and the mixture is smooth, pour this tempered yolk mixture back into the saucepan with the remaining coconut milk and sugar. Stir everything together until it’s well combined. Now, stir in the 1 teaspoon of vanilla extract. This adds a lovely aromatic depth to our cake. Let this mixture cool slightly while you prepare the dry ingredients.
Step 2: Combining the Dry Ingredients and Incorporating the Coconut
In a separate large bowl, combine the 1½ cup of glutinous rice flour with the 3 cups of shredded sweetened coconut. Whisk these together thoroughly to ensure the coconut is evenly distributed throughout the flour. This step is crucial for ensuring an even texture in the final cake. The glutinous rice flour is what gives our cake its characteristic sticky, chewy texture, so make sure it’s measured accurately. The shredded sweetened coconut adds both flavor and lovely pockets of texture.
Once your wet ingredients have cooled down a bit – they should be warm but not hot to the touch – gradually add the wet coconut milk mixture to the dry ingredients. Stir everything together using a whisk or a spatula until you have a smooth, thick batter. It will be quite thick, almost like a very thick pancake batter. Make sure there are no lumps of flour remaining. This batter will be dense, and that’s exactly what we want for our sticky cake.
Step 3: Whipping the Egg Whites to Stiff Peaks
Now for the egg whites! In a clean, dry bowl (it’s crucial that this bowl and your whisk attachments are free of any grease or yolk), beat the 2 egg whites. You can use an electric mixer for this, starting on a low speed and gradually increasing to high. Continue beating until the egg whites form stiff peaks. This means that when you lift the whisk, the peaks of the egg whites will stand up straight and hold their shape without drooping. This step introduces air into the batter, which will help to lighten the dense cake and give it a slightly more delicate texture within its chegrape juicess. Be patient here; achieving stiff peaks is key.
Step 4: Gently Folding the Egg Whites into the Batter
This is a delicate step that requires a gentle touch. We want to incorporate the airy egg whites into our dense batter without deflating them too much. Take about one-third of the whipped egg whites and gently fold them into the main batter using a spatula. Use an under-and-over motion, bringin extractg the batter from the bottom of the bowl up and over the egg whites. Don’t stir vigorously; we’re aiming to lighten the batter. Once that first portion of egg whites is mostly incorporated, add the remaining egg whites and continue to fold gently until just combined. You want to see streaks of egg white disappear, but don’t overmix. The batter will become a little lighter and airier.
Step 5: Baking the Sticky Coconut Cake
Preheat your oven to 350°F (175°C). Grease and flour a 9-inch round cake pan, or line it with parchment paper. Pour the batter into the prepared cake pan and spread it out evenly. Tap the pan gently on the counter a few times to release any large air bubbles. Place the cake pan in the preheated oven. Bake for approximately 40-50 minutes, or until a wooden skewer inserted into the center of the cake comes out clean. The top of the cake should be golden brown and slightly firm to the touch.
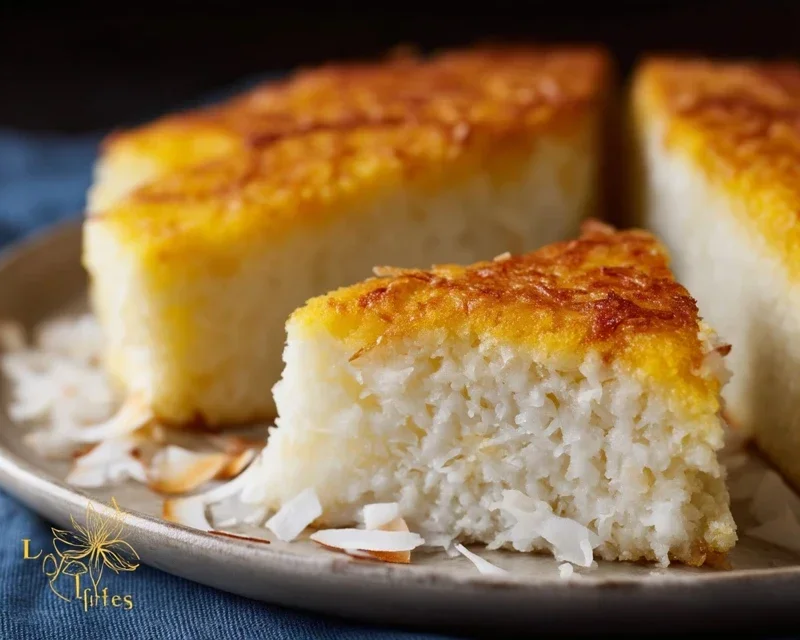
Once baked, let the cake cool in the pan for about 15-20 minutes before attempting to invert it onto a wire rack to cool completely. This allows the cake to set properly and makes it easier to handle. When it’s fully cooled, you’ll notice its wonderfully dense and slightly chewy texture. Slice it into squares or wedges and enjoy the rich, tropical flavor. This Sticky Coconut Cake is best enjoyed at room temperature or slightly warm. You can even add a drizzle of condensed milk or a dollop of whipped cream if you’re feeling extra indulgent!
Conclusion:
I hope you’ve enjoyed learning how to make this utterly delicious Sticky Coconut Cake! This recipe truly delivers a moist, tender crum extractb with an irresistible gooey coconut topping that’s simply divine. It’s the perfect balance of sweet, tropical flavor and comforting cake texture, making it a guaranteed crowd-pleaser for any occasion, from a casual afternoon tea to a special celebration. I find its simplicity belies its impressive taste and presentation, proving that sometimes the best bakes are the most straightforward.
This Sticky Coconut Cake is wonderfully versatile. Serve it warm, perhaps with a scoop of vanilla ice cream or a dollop of whipped cream to enhance its lusciousness. It’s also fantastic on its own, its sticky topping providing all the decadence you need. For variations, consider adding a sprinkle of toasted shredded coconut on top before baking for extra crunch, or a dash of lime zest to the batter for a zesty twist.
Don’t hesitate to give this recipe a try; I’m confident you’ll fall in love with its tropical charm and delightful texture. It’s a bake that brings smiles and happy sighs with every bite!
Frequently Asked Questions:
Can I make this Sticky Coconut Cake ahead of time?
Yes, absolutely! This cake actually benefits from being made a day in advance. The flavors have more time to meld, and the sticky topping can set beautifully. Store it at room temperature, covered loosely, for the best results.
What kind of coconut should I use for the topping?
For the most authentic and delicious sticky topping, I recommend using unsweetened shredded coconut. It absorbs the liquid wonderfully and creates that characteristic gooey texture. Sweetened coconut can sometimes make the topping too sweet.
Is it possible to freeze leftover cake?
Yes, you can freeze leftover Sticky Coconut Cake. Wrap individual slices tightly in plastic wrap and then place them in an airtight container or freezer bag. Thaw at room temperature before enjoying.
Sticky Coconut Cake
A delightfully sweet and chewy cake made with coconut milk, glutinous rice flour, and shredded coconut.
Ingredients
-
2 eggs, separated
-
1¼ cup granulated sugar
-
2¼ cup full fat canned coconut milk
-
3 cups shredded sweetened coconut
-
1½ cup glutinous rice flour
-
1 teaspoon vanilla extract
Instructions
-
Step 1
In a large bowl, whisk together the egg yolks, granulated sugar, and vanilla extract until pale and creamy. -
Step 2
Gradually whisk in the coconut milk until well combined. -
Step 3
Add the glutinous rice flour and shredded coconut to the wet ingredients, mixing until a smooth batter forms. -
Step 4
In a separate clean bowl, whisk the egg whites until stiff peaks form. -
Step 5
Gently fold the whipped egg whites into the coconut batter until just combined, being careful not to overmix. -
Step 6
Pour the batter into a greased and floured 9×13 inch baking pan. -
Step 7
Bake in a preheated oven at 350°F (175°C) for 35-45 minutes, or until a toothpick inserted into the center comes out clean. -
Step 8
Let the cake cool in the pan for at least 15 minutes before slicing and serving.
Important Information
Nutrition Facts (Per Serving)
It is important to consider this information as approximate and not to use it as definitive health advice.
Allergy Information
Please check ingredients for potential allergens and consult a health professional if in doubt.