Rainbow Filled Doughnuts- Fun & Festive Treat
Rainbow-Filled Doughnuts aren’t just a treat; they’re a vibrant explosion of joy for your taste buds and your eyes! Imagin extracte biting into a cloud-like doughnut, only to discover a luscious, swirling filling of every color under the sun. It’s that element of surprise, the hidden treasure within, that makes these rainbow doughnuts so utterly irresistible. We all have a soft spot for doughnuts, don’t we? That comforting sweetness, the satisfying chew, the endless possibilities for topping. But these rainbow-filled delights take it to a whole new level of fun. What makes them truly special is the magic we create by infusing classic doughnut goodness with a burst of colorful, delicious cream. They’re perfect for birthdays, celebrations, or just to brighten up an ordinary Tuesday. Get ready to unleash your inner artist and baker, because we’re diving into how to create these spectacular treats that are guaranteed to put a smile on everyone’s face.
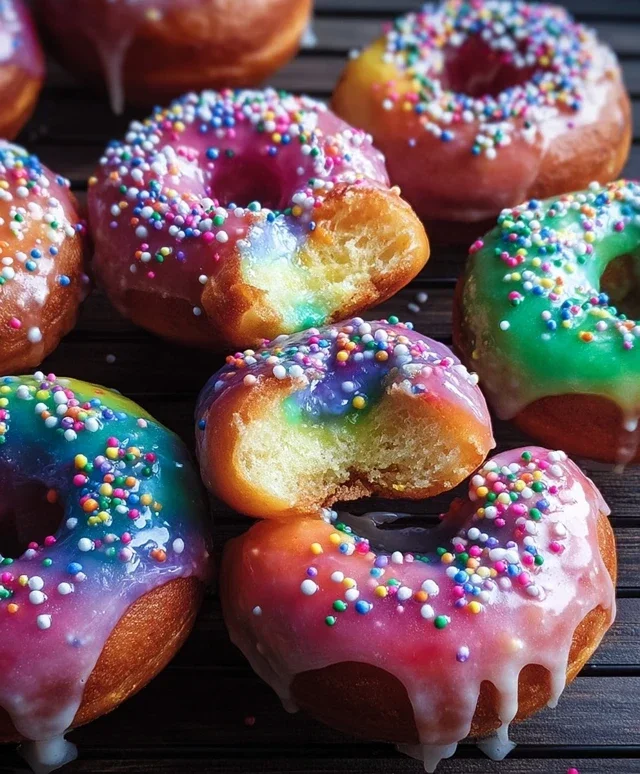
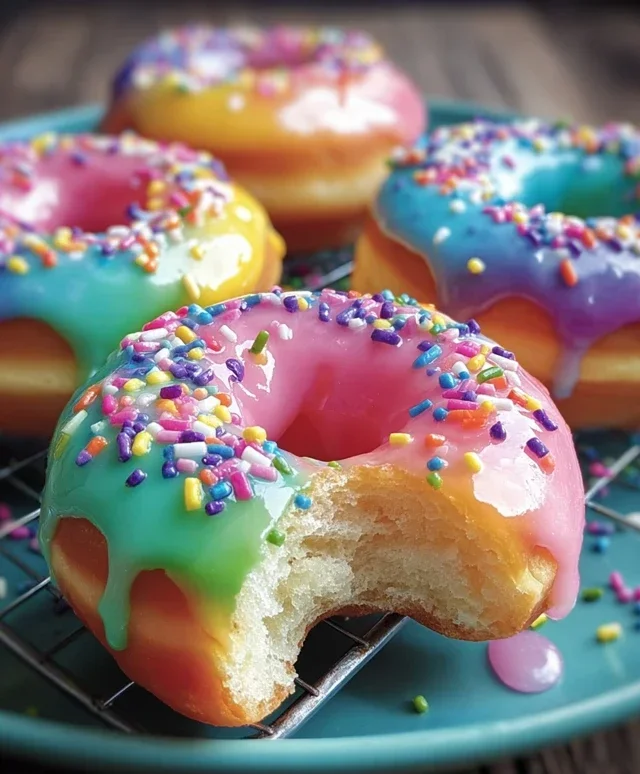
Rainbow-Filled Doughnuts
Get ready to brighten your day with these absolutely stunning Rainbow-Filled Doughnuts! These aren’t just any doughnuts; they’re little pockets of joy, bursting with vibrant, creamy pudding and topped with a cheerful cascade of sprinkles. They’re perfect for a special breakfast, a delightful afternoon treat, or even a fun project to do with family and friends. The process might seem a little involved, but trust me, the end result is so worth it. We’re going to guide you through every step to ensure your doughnuts are light, fluffy, and filled to the brim with colorful deliciousness.
Ingredients:
Instructions:
Step 1: Activating the Yeast and Making the Dough
The first step to perfect doughnuts is to get your yeast going. In a small bowl, combine the warm water and the 1 teaspoon of granulated sugar. Sprinkle the active dry yeast over the top. Give it a gentle stir and then let it sit for about 5 to 10 minutes. You’ll know your yeast is alive and ready when it becomes foamy and bubbly. This “blooming” process is crucial for ensuring your doughnuts will rise beautifully. If you don’t see any foam, your yeast might be old, and it’s best to start with a fresh packet.
While the yeast is doing its thing, in a large mixing bowl (or the bowl of your stand mixer), combine the 2½ cups of all-purpose flour, ¼ cup of granulated sugar, and 2 teaspoons of salt. Give these dry ingredients a quick whisk to distribute the salt and sugar evenly. Once your yeast mixture is foamy, add it to the dry ingredients. Add the 2 large eggs and the 2 tablespoons of softened unsalted butter. If you’re using a stand mixer, attach the dough hook and mix on low speed until the ingredients just start to come together. If you’re mixing by hand, stir with a wooden spoon until a shaggy dough forms.
Step 2: Kneading and Proofing the Dough
Now it’s time to knead the dough. Continue mixing with the dough hook on medium-low speed for about 8-10 minutes, or until the dough is smooth, elastic, and pulls away from the sides of the bowl. It should feel soft and slightly tacky, but not sticky. If you’re kneading by hand, turn the dough out onto a lightly floured surface and knead for about 10-12 minutes, pushing, folding, and turning the dough until it reaches that smooth, elastic consistency.
Once the dough is kneaded, place it in a lightly oiled large bowl. Turn the dough to coat it with a thin layer of oil, which will prevent it from drying out. Cover the bowl tightly with plastic wrap or a damp kitchen towel. Find a warm, draft-free spot for your dough to rise. This is where the magic happens! Let it rise for about 1 to 1.5 hours, or until it has doubled in size. This first proof is essential for developing that light and airy texture we all love in doughnuts.
Step 3: Shaping and Second Proofing
After the dough has doubled in size, gently punch it down to release the air. Turn the dough out onto a lightly floured surface. Now, we’ll shape our doughnuts. You can either roll the dough out to about ½ inch thickness and use a doughnut cutter to create the classic rings, or you can pinch off small pieces of dough, roll them into balls, and then flatten them slightly. For filled doughnuts, it’s often easier to work with slightly smaller, un-cut pieces that you’ll later fill. If you’re making ring doughnuts, place them on parchment-lined baking sheets. If you’re making filled doughnuts, just place the flattened rounds on parchment-lined baking sheets.
Once shaped, cover the doughnuts loosely with plastic wrap or a clean kitchen towel. Let them rest and rise again for another 30-45 minutes. They won’t double in size this time, but they should puff up noticeably. This second proof ensures they’ll be wonderfully light and tender when fried. While they’re proofing, prepare your frying station. You’ll need a large, heavy-bottomed pot or Dutch oven filled with about 2-3 inches of canola oil. Heat the oil over medium heat to around 350°F (175°C). It’s important to maintain this temperature for even cooking.
Step 4: Frying the Doughnuts
Once the doughnuts have had their second rise and the oil is at the correct temperature, it’s time to fry! Carefully slide 2-3 doughnuts into the hot oil at a time, being careful not to overcrowd the pot. Overcrowding will lower the oil temperature and result in greasy doughnuts. Fry each doughnut for about 1-2 minutes per side, or until they are a beautiful golden brown. Use a slotted spoon or spider strainer to gently flip them and to remove them from the oil.
Place the fried doughnuts on a wire rack set over a baking sheet to drain off any excess oil. This will help them stay crispy. Repeat this process with the remaining doughnuts, making sure to let the oil come back up to temperature between batches. Don’t worry if some of your doughnuts are a little misshapen; they’ll be filled and decorated, so any imperfections will be beautifully disguised! The aroma of freshly fried doughnuts is truly non-intoxicating, and you’ll be tempted to sneak one right away!
Step 5: Making the Filling and Decorating
Now for the fun part: the rainbow filling and decoration! In a medium bowl, whisk together the 1½ cups of confectioner’s sugar and ½ cup of whipping cream until smooth and thick. This will form our creamy base for the filling. Divide the vanilla pudding into small bowls, one for each color of food coloring you’re using. Add a few drops of red food coloring to one bowl and stir until you achieve a vibrant red. Repeat this with the orange, yellow, green, blue, and purple food colorings in separate bowls. You’ll end up with six bowls of beautifully colored vanilla pudding.
Once the doughnuts have cooled slightly (they should still be warm but not hot), it’s time to fill them. You can use a piping bag with a long, thin tip, or a small spoon to carefully insert the colorful pudding into the center of each doughnut. Don’t be shy; fill them generously! Then, dip the tops of the doughnuts into the confectioner’s cream glaze you made earlier. Immediately after glazing, generously sprinkle them with rainbow sprinkles. The sprinkles will stick to the wet glaze, creating a dazzling, festive finish. Let the glaze set for a few minutes before serving. Enjoy your beautiful, homemade Rainbow-Filled Doughnuts!
Conclusion:
And there you have it – a delightful guide to creating your very own stunning Rainbow-Filled Doughnuts! This recipe truly offers a feast for both the eyes and the taste buds. The magic lies not only in the vibrant, colorful swirls of filling but also in the satisfyingly fluffy texture of the doughnut itself. It’s a project that’s surprisingly achievable and incredibly rewarding, perfect for adding a touch of joy to any occasion. Imagin extracte the delight on faces when they bite into these whimsical treats!
For serving, these rainbow-filled delights are fantastic on their own, but they also pair beautifully with a simple cup of coffee or tea. For an extra festive touch, consider dusting them with a little powdered sugar or adding a sprinkle of edible glitter. When it comes to variations, the possibilities are endless! You could experiment with different fruit-based fillings like strawberry, blueberry, or mango for a natural sweetness and vibrant color. For a richer experience, try a cream cheese or chocolate ganache filling. Don’t be afraid to play with the colors – beyond the rainbow, think pastels or even ombre effects!
I truly encourage you to give this rainbow-filled doughnut recipe a try. It’s more than just baking; it’s an act of creating happiness, and the smiles you’ll bring are worth every step. Let your creativity shine and enjoy the process!
Frequently Asked Questions:
Can I make the dough ahead of time?
Yes, absolutely! You can prepare the doughnut dough the day before and refrigerate it. Allow it to come to room temperature for about 30-60 minutes before proceeding with shaping and frying. This can be a great time-saver for busy mornings.
How do I get the filling to stay inside the doughnut?
The key is to ensure your doughnuts are completely cooled before filling. Using a piping bag with a long, thin tip inserted into the side or bottom of the doughnut will help distribute the filling evenly. Don’t overfill them, or the filling might escape.
Are there any tips for achieving perfectly round doughnuts?
While perfect symmetry isn’t always necessary for deliciousness, you can help your doughnuts hold their shape by being gentle when shaping the dough and giving them enough space to rest and proof without touching each other. Once fried, they tend to puff up beautifully.
Rainbow-Filled Doughnuts
Delightful homemade doughnuts filled with colorful vanilla pudding and coated in a sweet glaze, perfect for a festive treat.
Ingredients
-
2 tablespoons active dry yeast
-
½ cup warm water (105-110°F)
-
1 teaspoon granulated sugar (for yeast)
-
2½ cups all-purpose flour
-
¼ cup granulated sugar
-
2 large eggs
-
2 tablespoons unsalted butter, room temperature
-
2 teaspoons salt
-
Canola oil for frying
-
1½ cups confectioner’s sugar
-
½ cup whipping cream
-
Rainbow sprinkles for decoration
-
2½ cups vanilla pudding
-
Rainbow food coloring (red, orange, yellow, green, blue, purple)
Instructions
-
Step 1
In a small bowl, combine warm water, granulated sugar (for yeast), and active dry yeast. Let stand for 5-10 minutes until foamy. -
Step 2
In a large bowl, whisk together all-purpose flour, ¼ cup granulated sugar, and salt. Make a well in the center. -
Step 3
Add the yeast mixture, eggs, and softened butter to the well. Mix until a shaggy dough forms. Knead on a floured surface for 5-7 minutes until smooth and elastic. -
Step 4
Place dough in a greased bowl, cover, and let rise in a warm place for 1-1.5 hours, or until doubled in size. Punch down the dough. -
Step 5
Roll out dough to about ½ inch thickness. Cut out doughnut shapes using a cutter. Let them rest for 15-20 minutes. -
Step 6
Heat canola oil in a deep pot or fryer to 350°F (175°C). Fry doughnuts for 1-2 minutes per side until golden brown. Drain on paper towels. -
Step 7
While doughnuts cool, prepare the glaze: whisk together confectioner’s sugar and whipping cream until smooth. If too thick, add a little more cream. If too thin, add more confectioner’s sugar. -
Step 8
Divide vanilla pudding into 6 portions. Tint each portion with a different rainbow food coloring. Spoon into piping bags. -
Step 9
Once doughnuts are slightly cooled, dip them in the glaze and immediately sprinkle with rainbow sprinkles. Alternatively, pipe the colored puddings into the doughnuts before glazing.
Important Information
Nutrition Facts (Per Serving)
It is important to consider this information as approximate and not to use it as definitive health advice.
Allergy Information
Please check ingredients for potential allergens and consult a health professional if in doubt.