Easy St Patrick’s Day Cookies – Festive & Fun Treats
Easy St. Patrick’s Day cookies are the absolute best way to sprinkle a little bit of magic and a whole lot of deliciousness into your celebrations! Who doesn’t love a festive treat that’s both adorable and incredibly simple to make? These aren’t just any cookies; they’re little bites of green cheer designed to bring smiles to everyone’s faces, from the littlest leprechauns to the grown-ups searching for their pot of gold. What makes these particular Easy St. Patrick’s Day cookies so special is their adaptability. Whether you’re a seasoned baker or a kitchen novice, you’ll find this recipe forgiving and fun. We’re talking minimal fuss, maximum flavor, and a guaranteed way to impress without spending hours slaving away. Get ready to embrace the spirit of the holiday with these delightful, easy-to-create St. Patrick’s Day cookies!
Easy St. Patrick’s Day Cookies
Feeling the spirit of St. Patrick’s Day but short on time and baking expertise? Don’t worry, I’ve got you covered with these incredibly simple and absolutely delicious St. Patrick’s Day cookies! Forget complicated recipes that require fancy techniques or a pantry full of obscure ingredients. These cookies are a game-changer. We’re going to leverage a secret weapon – a box of white cake mix – to create festive, fluffy, and wonderfully sweet treats that will have everyone thinking you’re a baking pro. They’re perfect for a last-minute party, a fun activity with the kids, or just a little burst of holiday cheer for yourself. The vibrant green color makes them instantly festive, and the simple dough means you’ll be enjoying them in no time. Get ready to add a touch of Irish luck to your kitchen!
Ingredients:
Baking Instructions
This recipe is designed for ultimate ease. We’ll start by bringin extractg our dough together, then move on to shaping and baking, and finally, a simple dusting to make them truly special.
Mixing the Dough
First things first, let’s get our dough ready. In a large mixing bowl, combine the contents of your white cake mix. Make sure you’ve measured out about 3 cups if your box is slightly different, though most standard boxes are around this amount. To this dry mix, add your two large eggs. Eggs are essential for binding the ingredients and providing richness and structure to our cookies. Next, pour in the 1/3 cup of vegetable oil. Vegetable oil is a great choice here because it’s neutral in flavor and helps create a wonderfully tender cookie crum extractb.
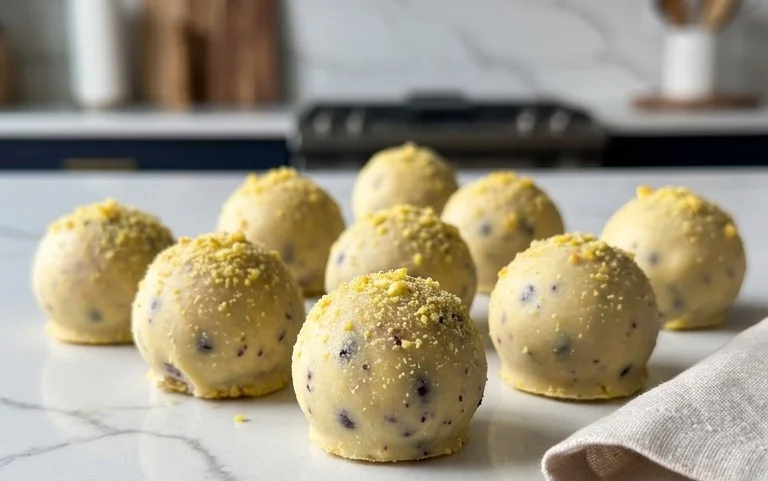
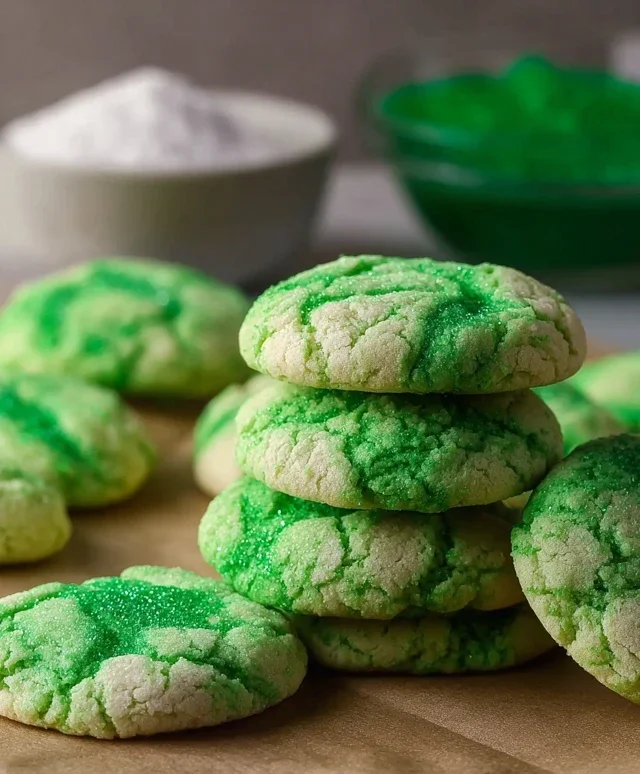
Now for the magic that makes them St. Patrick’s Day-ready: the Kelly green gel food coloring. Add just 1/4 teaspoon to start. Gel food coloring is much more concentrated than liquid, so a little goes a long way in achieving that vibrant, festive green. If you want a deeper, more intense green, you can add another drop or two, but be cautious not to add too much, as it can slightly alter the texture. Stir everything together with a spoon or spatula until it’s just combined. Don’t overmix at this stage; we don’t want to develop the gluten in the cake mix too much, as that can lead to tougher cookies. You should have a thick, slightly sticky dough.
Shaping and Baking
Once your dough is mixed, it’s time to get it ready for the oven. Preheat your oven to 350 degrees Fahrenheit (175 degrees Celsius). While the oven is heating up, line a baking sheet with parchment paper. This is a crucial step for easy cleanup and to prevent your cookies from sticking. You can also lightly grease your baking sheet, but parchment paper is generally more reliable.
Now, let’s shape our cookies. The dough will be a bit sticky, so here’s a little tip: lightly wet your hands with water or spray them with a bit of cooking spray. This will prevent the dough from clingin extractg to your fingers. Take a rounded tablespoon of dough and roll it gently between your palms to form a small ball. Place each ball onto your prepared baking sheet, leaving about 2 inches between them because they will spread slightly as they bake. If you’re feeling fancy and want a slightly flatter cookie, you can gently press down on the top of each dough ball with the bottom of a glass or your palm. For this recipe, I prefer to leave them as little green mounds for a more rustic look, but either way works beautifully.
Baking to Perfection
Now it’s time to bake these little green gems. Carefully place the baking sheet into your preheated oven. We’re going to bake these for approximately 10-12 minutes. The exact baking time will depend on your oven and the size of your cookies. You’ll know they’re ready when the edges are just starting to turn a very light golden brown, and the centers look set. They might still look a little soft in the middle, but they will continue to firm up as they cool. Overbaking will result in dry, hard cookies, so it’s better to err on the side of slightly underbaked.
Once baked, remove the baking sheet from the oven. Let the cookies cool on the baking sheet for about 5 minutes. This allows them to firm up enough to be moved without falling apart. After 5 minutes, carefully transfer the cookies to a wire cooling rack to cool completely. This is important for achieving the perfect texture and for them to be ready for their final touch.
The Finishing Touch
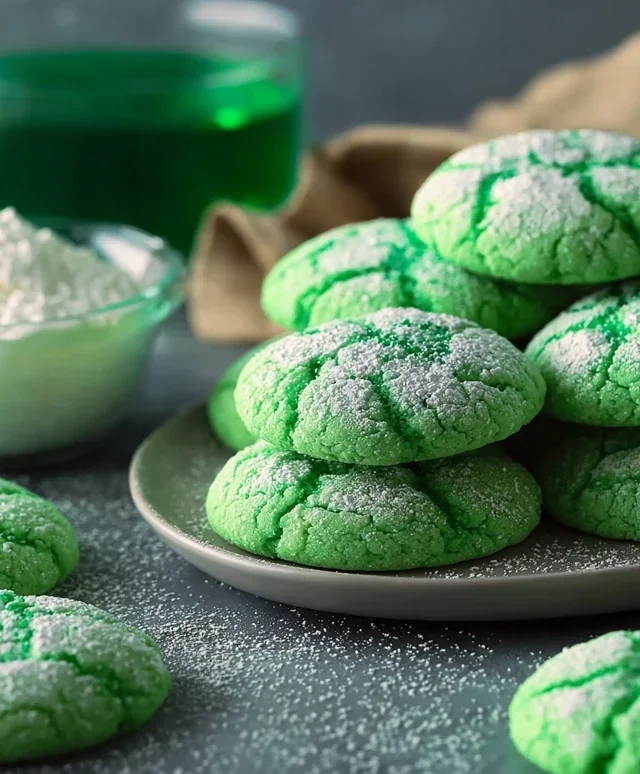
While your cookies are cooling, let’s prepare the simple glaze that adds a touch of sweetness and a beautiful finish. In a small bowl, whisk together the 3 tablespoons of granulated sugar and the 6 tablespoons of powdered sugar. This mixture will act as our easy, no-fuss dusting. Once the cookies are completely cool – and I really mean completely cool, otherwise the sugar will just melt into a sticky mess – you can dust them generously with this sugar mixture. You can use a sieve for an even coating, or simply sprinkle it on with your fingers. The combination of granulated and powdered sugar gives a delightful textural contrast and a lovely sparkle. These cookies are now ready to be enjoyed! They are best eaten within a few days and stored in an airtight container at room temperature. Enjoy your lucky green treats!
Conclusion:
There you have it – a delightful and incredibly simple recipe for Easy St. Patrick’s Day Cookies! This recipe is a winner because it requires minimal effort and ingredients, making it perfect for even the most novice bakers. The festive green color and customizable decorations ensure these cookies are not only delicious but also a visual treat, embodying the spirit of the holiday. They are fantastic served alongside a glass of milk for a sweet afternoon snack, or as a charming addition to any St. Patrick’s Day party spread. For a twist, consider adding a pinch of lime zest to the dough for an extra citrusy kick, or experiment with different sprinkles and edible glitter for a truly dazzling finish. I genuinely encourage you to give this recipe a try; you’ll be amazed at how easy it is to create something so special!
Frequently Asked Questions:
Can I make these cookies ahead of time?
Absolutely! These Easy St. Patrick’s Day Cookies can be baked and stored in an airtight container at room temperature for up to 3-4 days. For longer storage, you can freeze the un-decorated cookies for up to a month. Ensure they are completely cooled before storing.
What if I don’t have green food coloring?
No problem at all! While green is traditional for St. Patrick’s Day, these cookies are delicious no matter the color. You can omit the food coloring entirely for a classic vanilla cookie, or use other colors like gold or white for a different festive look. You can also use naturally colored extracts like matcha powder for a subtle green hue and earthy flavor.
How can I make the green color more vibrant?
For a more intense green, use gel food coloring rather than liquid. Gel colors are more concentrated and will provide a richer hue with less amount. Start with a small amount and gradually add more until you achieve your desired shade of green.
Easy St. Patrick’s Day Cookies
Simple and festive green cookies perfect for St. Patrick’s Day celebrations.
Ingredients
-
1 box (15.25 oz) white cake mix (about 3 cups)
-
2 large eggs
-
1/3 cup vegetable oil
-
1/4 teaspoon Kelly green gel food coloring
-
3 tablespoons granulated sugar
-
6 tablespoons powdered sugar
Instructions
-
Step 1
Preheat oven to 350°F (175°C). Line baking sheets with parchment paper. -
Step 2
In a large bowl, combine the white cake mix, eggs, and vegetable oil. -
Step 3
Add the Kelly green gel food coloring and mix until the dough is evenly colored. -
Step 4
Roll dough into 1-inch balls and then roll each ball in granulated sugar. -
Step 5
Place balls about 2 inches apart on the prepared baking sheets. -
Step 6
Bake for 8-10 minutes, or until the edges are lightly golden. -
Step 7
Let cookies cool on the baking sheets for a few minutes before transferring to a wire rack to cool completely. Once cool, dust with powdered sugar if desired.
Important Information
Nutrition Facts (Per Serving)
It is important to consider this information as approximate and not to use it as definitive health advice.
Allergy Information
Please check ingredients for potential allergens and consult a health professional if in doubt.