Easy No-Bake Peanut Butter Energy Bites Recipe
No-Bake Peanut Butter Energy Bites are your new best friend when that afternoon slump hits, or you need a quick pre-workout boost that actually tastes like a treat! Forget complicated baking instructions and oven preheating; these little powerhouses come together in a matter of minutes with just a few pantry staples. What’s not to love about a recipe that’s both incredibly easy and ridiculously delicious? They’re a fantastic way to curb cravings while providing sustained energy, thanks to the perfect combination of protein-packed peanut butter, wholesome oats, and natural sweetness. I adore these No-Bake Peanut Butter Energy Bites because they’re so versatile – you can toss in your favorite add-ins like chocolate chips or shredded coconut. They’re the ultimate guilt-free indulgence that keeps you going strong. Get ready to discover your new go-to snack!
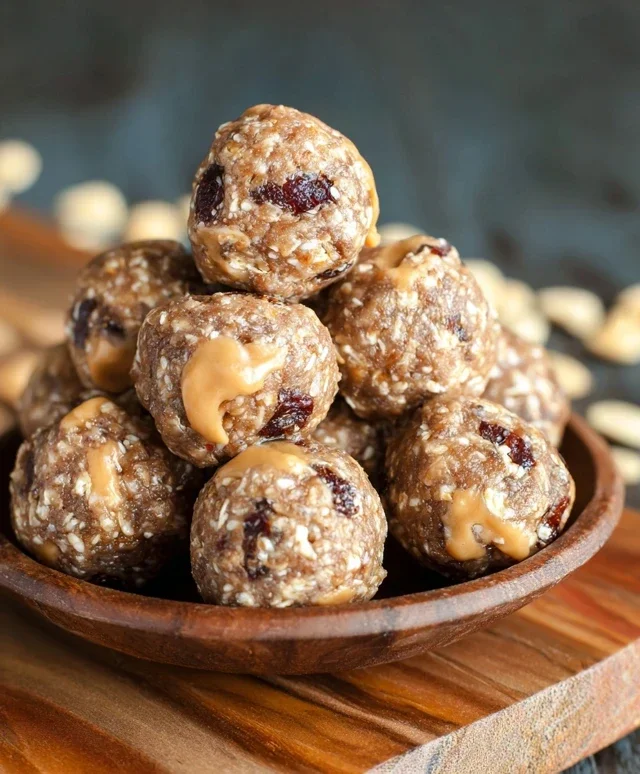
No-Bake Peanut Butter Energy Bites
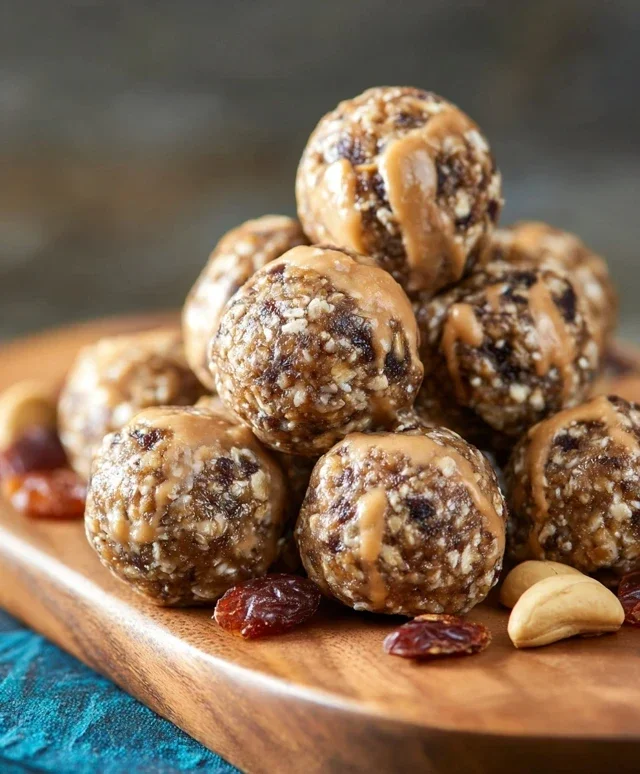
Feeling that afternoon slump? Need a quick, satisfying, and delicious way to power through your day? These No-Bake Peanut Butter Energy Bites are your new best friend! Forget complicated baking processes and long oven times. With just a handful of simple ingredients and a few minutes of stirring, you’ll have a batch of delightful little treats packed with sustained energy. They’re perfect for breakfast on the go, a pre- or post-workout snack, or even a healthier alternative when that sweet craving strikes. The combination of creamy peanut butter, chewy oats, and sweet honey creates a flavor explosion that’s both comforting and invigorating. And the mini chocolate chips? They’re just the cherry on top, adding that extra touch of indulgence without derailing your healthy intentions.
One of the best things about these energy bites is their versatility. While this recipe uses classic peanut butter and chocolate chips, feel free to get creative! You can easily swap out the chocolate chips for dried cranberries, chopped nuts, or even a sprinkle of shredded coconut. If you prefer a different nut butter, almond butter or sunflower seed butter are excellent alternatives. The key is the binder created by the peanut butter and honey, which holds everything together beautifully. This recipe is also incredibly forgiving, meaning you don’t need to be a master chef to whip up a batch. It’s a fantastic recipe to make with kids, as they can help measure, stir, and roll the bites. Let’s get started on creating these little powerhouses of deliciousness!
Ingredients:
Instructions:
Combine the Wet Ingredients: In a medium-sized mixing bowl, add your ¼ cup of peanut butter. For the best results, I recommend using a creamy, natural peanut butter that doesn’t have added sugars or oils, as this will create a better texture and flavor profile. If your peanut butter is a bit stiff from being in the fridge, you can gently warm it for about 10-15 seconds in the microwave to make it easier to stir. Next, add your 2 tablespoons of honey to the bowl. Honey is a fantastic natural sweetener and also acts as a binder, helping to hold all the ingredients together. If you prefer a less sweet treat, you can start with a tablespoon and a half of honey, but I find two tablespoons provides the perfect balance of sweetness and stickiness for these bites. Make sure your honey is also at a pourable consistency; if it’s crystallized, you can warm it slightly as well.
Mix Thoroughly: Once your peanut butter and honey are in the bowl, it’s time to get mixing! Use a sturdy spoon or a spatula to thoroughly combine the peanut butter and honey. You want to achieve a smooth, well-incorporated mixture. There shouldn’t be any distinct streaks of peanut butter or honey; it should look like a cohesive, slightly glossy paste. This step is crucial for ensuring that each energy bite has an even distribution of flavor and binding agents, which will make rolling them into balls much easier in the later stages.
Incorporate the Dry Ingredients: Now, it’s time to add the ½ cup of quick oats to the wet mixture. Quick oats are ideal here because they have a softer texture and will absorb moisture more readily, leading to a chewier, more cohesive energy bite. If you only have rolled oats (old-fashioned oats), you can still use them, but the texture might be a little bit coarser. You can also pulse them briefly in a food processor to break them down slightly if you prefer a smoother consistency. Gently stir the oats into the peanut butter and honey mixture. Continue stirring until the oats are mostly coated and you have a thick, somewhat sticky dough-like consistency. If the mixture seems too dry and crum extractbly, you can add a tiny bit more honey or peanut butter (about ½ teaspoon at a time) until it comes together. If it feels too wet, you can add a tablespoon of oats.
Add the “Choc” Factor: This is where the magic happens for many people – adding the ¼ cup of mini chocolate chips! Mini chocolate chips distribute more evenly throughout the mixture and provide little bursts of chocolatey goodness in every bite. Gently fold the chocolate chips into the dough. Be careful not to overmix at this stage, as you want the chocolate chips to remain relatively intact and not melt into the mixture. You should be able to see distinct chocolate chips throughout the dough. This addition transforms these simple energy bites into a truly decadent treat that’s still packed with wholesome ingredients.
Chill and Roll: At this point, the mixture will likely be quite sticky, which is exactly what we want for easy rolling. To make the rolling process less messy and more effective, cover the bowl with plastic wrap and place it in the refrigerator for about 15-30 minutes. This chilling period allows the oats to absorb some of the moisture and firms up the peanut butter, making the dough much easier to handle. Once chilled, take the bowl out of the fridge. Using your hands, scoop out about a tablespoon of the mixture at a time. Roll it firmly between your palms to form small, compact balls. If the mixture starts to get too sticky on your hands, you can lightly wet your hands with water or lightly grease them with a tiny bit of coconut oil or non-stick spray. Continue this process until all the mixture has been rolled into energy bites. You should yield about 12-15 bites depending on their size.
Storage and Enjoyment: Once your energy bites are all rolled, you can enjoy them immediately! They are best stored in an airtight container in the refrigerator. This helps them maintain their shape and texture. They will keep well in the fridge for about a week. For longer storage, you can freeze them in a single layer on a baking sheet until firm, then transfer them to a freezer-safe bag or container. They can be enjoyed straight from the freezer or thawed at room temperature for a few minutes. These little bites are incredibly satisfying and are the perfect companion for busy days. Enjoy your delicious homemade energy boost!
Conclusion:
These no-bake peanut butter energy bites are an absolute game-changer for anyone seeking a quick, delicious, and wholesome snack. They’re incredibly easy to whip up with just a few pantry staples, making them perfect for last-minute cravings or meal prep. The blend of creamy peanut butter, hearty oats, and a touch of sweetness creates a satisfying texture and flavor that fuels your day without weighing you down. Whether you’re a busy student, a working professional, or a parent on the go, these bites are your secret weapon for sustained energy.
I love serving these as a post-workout treat, a mid-afternoon pick-me-up, or even as a small dessert. They are also fantastic to have on hand for unexpected guests! Don’t be afraid to get creative with variations. You can easily swap out the peanut butter for almond butter or cashew butter, add in your favorite dried fruits like cranberries or raisins, or even sprinkle in some chia seeds or flaxseeds for an extra nutritional boost. I sometimes even add a dash of cinnamon or a few mini chocolate chips for an extra decadent touch!
I truly encourage you to give these no-bake peanut butter energy bites a try. They’re so forgiving and adaptable, you’ll be making them time and time again. Let me know in the comments what your favorite variations are!
Frequently Asked Questions:
Can I make these ahead of time?
Absolutely! These energy bites are perfect for making ahead. Store them in an airtight container in the refrigerator for up to a week, or you can even freeze them for longer storage. They thaw quickly at room temperature, making them a convenient grab-and-go option whenever you need a snack.
What if I don’t have rolled oats?
While rolled oats provide the best texture, you can use quick oats in a pinch. Just be aware that the texture might be a little softer. Steel-cut oats are generally not recommended as they are too hard and won’t soften sufficiently without cooking.
Are these bites gluten-free?
You can easily make these gluten-free by ensuring you use certified gluten-free rolled oats. All other common ingredients like peanut butter and honey are typically gluten-free, so checking your oat packagin extractg is the key!
No-Bake Peanut Butter Energy Bites
Quick and easy no-bake energy bites packed with peanut butter, oats, and chocolate chips. Perfect for a healthy snack.
Ingredients
-
½ cup quick oats
-
¼ cup peanut butter
-
2 tablespoons honey
-
¼ cup mini chocolate chips
-
1 teaspoon vanilla extract
-
1 tablespoon chia seeds
Instructions
-
Step 1
In a medium bowl, combine the quick oats, peanut butter, honey, and vanilla extract. -
Step 2
Stir in the mini chocolate chips and chia seeds until well combined. -
Step 3
If the mixture is too sticky, add a little more oats (1 teaspoon at a time) until it’s easier to handle. -
Step 4
Roll the mixture into small balls, about 1-inch in diameter. -
Step 5
Place the energy bites on a plate or baking sheet lined with parchment paper. -
Step 6
Refrigerate for at least 30 minutes to allow them to firm up before serving.
Important Information
Nutrition Facts (Per Serving)
It is important to consider this information as approximate and not to use it as definitive health advice.
Allergy Information
Please check ingredients for potential allergens and consult a health professional if in doubt.