Country Fried Chicken Recipe- Crispy & Delicious
Country fried chicken is more than just a meal; it’s a warm hug on a plate, a taste of home, and a culinary cornerstone for so many of us. There’s something utterly irresistible about that shatteringly crisp, golden-brown crust giving way to impossibly juicy, tender chicken nestled within. It’s the kind of dish that sparks joy, conjures memories of family gatherings, and silences even the most discerning eaters with its sheer deliciousness. We love country fried chicken for its comforting familiarity, its deeply satisfying textures, and its ability to make any ordinary day feel a little bit extraordinary.
What truly sets this country fried chicken apart is the perfect balance – not too greasy, not too dry, but just right.
It’s a recipe that’s been perfected over generations, a testament to simple ingredients transformed into something truly magical. Get ready to embark on a journey to create your own legendary batch of country fried chicken that will have everyone asking for seconds (and thirds!).
Crispy, Juicy Country Fried Chicken That Will Make You Say “Yeehaw!”
There’s something undeniably comforting about a plate of golden-brown, perfectly seasoned country fried chicken. It’s a dish that evokes warm memories, Sunday dinners, and the simple joy of good food. While it might seem intimidating to achieve that perfect crispy exterior and succulent interior, I’m here to tell you it’s totally achievable in your own kitchen. Forget those soggy, under-seasoned attempts; this recipe is designed to deliver a truly spectacular result every time. We’re talking about chicken that’s seasoned to perfection, boasts a shatteringly crisp crust, and remains incredibly juicy. So, tie on your apron, and let’s get cooking!
Ingredients:
Prep Work: Setting the Stage for Success
The foundation of great fried chicken lies in proper preparation. First, take your 4 boneless, skinless chicken breasts. If they are particularly thick, I like to pound them slightly to an even thickness, about ½ to ¾ inch. This ensures they cook through evenly without the thinner parts drying out. You can do this by placing the chicken breasts between two pieces of plastic wrap or inside a large zip-top bag and using the flat side of a meat mallet or even a rolling pin. Don’t go too crazy; we’re not aiming for paper-thin, just uniform thickness for even cooking. Once prepped, set them aside.
Next, let’s prepare our wet dredge. In a medium-sized bowl, pour in your 2 cups of buttermilk. Buttermilk is key here. Its acidity helps to tenderize the chicken and creates a fantastic surface for the flour to adhere to, leading to that coveted crispy coating. To the buttermilk, add your 2 whisked large eggs. Give it a good whisk until the yolks and whites are fully combined. This egg and buttermilk mixture is what will bind our seasoned flour to the chicken, creating that beautiful, craggy coating we all love.
The Flavorful Flour Dredge
Now for the magic of seasoning! In a separate large, shallow dish or bowl (a pie plate or a wide, shallow bowl works best for easy dredgin extractg), combine your 1 ½ cups of all-purpose flour. This is the base of our crispy coating. To this, add ½ cup of breadcrum extractbs. I prefer to use plain breadcrum extractbs so I can control the seasoning entirely, but Italian-style breadcrum extractbs will also work if you enjoy those herbs. Whichever you choose, it contributes to the crispiness of the crust.
The real flavor comes from our spice blend. To the flour and breadcrum extractb mixture, add 2 ½ teaspoons of seasoned salt. This already has salt and some spices, but we’re building on it. Next, sprinkle in ¾ teaspoon of paprika for a beautiful color and a subtle sweetness. For a little kick, add ½ teaspoon of cayenne pepper. If you’re sensitive to spice, you can reduce or omit this, but a touch of heat really elevates the dish. Finally, add 1 ½ teaspoons of freshly ground black pepper for that classic peppery bite. Whisk all these dry ingredients together thoroughly until everything is evenly distributed. You want to make sure every piece of chicken gets a good coating of this flavorful mixture.
The Art of the Dredge
This is where we get our chicken ready for its crispy destiny. Take one piece of your prepared chicken breast and carefully place it into the buttermilk and egg mixture. Make sure it’s fully submerged, letting it soak for a minute or two on each side. This rehydrates the chicken and ensures the flour will stick.
Now, lift the chicken out of the wet mixture, letting any excess drip back into the bowl for a moment. Immediately transfer it to your seasoned flour mixture. This is the crucial dredgin extractg step. Use your hands or a fork to press the flour mixture onto all sides of the chicken. You want to ensure it’s completely coated, pressing gently to create those nooks and crannies that will fry up beautifully. For an extra-crispy coating, some people like to dip the chicken back into the buttermilk mixture again and then into the flour again for a double dredge. I find a single, thorough dredge is usually sufficient for a fantastic crunch, but feel free to experiment! Place the dredged chicken onto a wire rack set over a baking sheet. Repeat this process with all 4 chicken breasts. Letting the dredged chicken rest on the wire rack for about 10-15 minutes before frying can help the coating adhere better and dry out slightly, leading to an even crispier crust.
Frying to Golden Perfection
Now for the main event: frying! In a large, heavy-bottomed skillet (cast iron is ideal here for even heat distribution), add your 1 ½ cups of vegetable oil. Heat the oil over medium-high heat until it reaches about 350°F (175°C). If you don’t have a thermometer, you can test the oil by dropping a tiny pinch of flour into it. If it sizzles immediately and floats to the top, your oil is ready. It’s important to maintain this temperature throughout the frying process. If the oil is too cool, the chicken will absorb too much grease and become greasy. If it’s too hot, the outside will burn before the inside is cooked through.
Carefully place 2 chicken breasts into the hot oil, making sure not to overcrowd the pan. Overcrowding will lower the oil temperature drastically and result in soggy chicken. You should hear a satisfying sizzle as the chicken hits the oil. Fry the chicken for about 6-8 minutes per side, or until it’s a deep golden brown and cooked through. The internal temperature should reach 165°F (74°C). You can use a meat thermometer to check for doneness. Using tongs, carefully flip the chicken breasts to ensure even browning.
Once the first batch is golden and cooked through, remove the chicken from the skillet and place it back onto the wire rack set over a baking sheet. This allows any excess oil to drain off. If you are frying the second batch immediately, you may need to let the oil come back up to temperature. Be patient, as this is crucial for achieving that perfect crispy texture. Repeat the frying process with the remaining 2 chicken breasts.
Serving Your Masterpiece
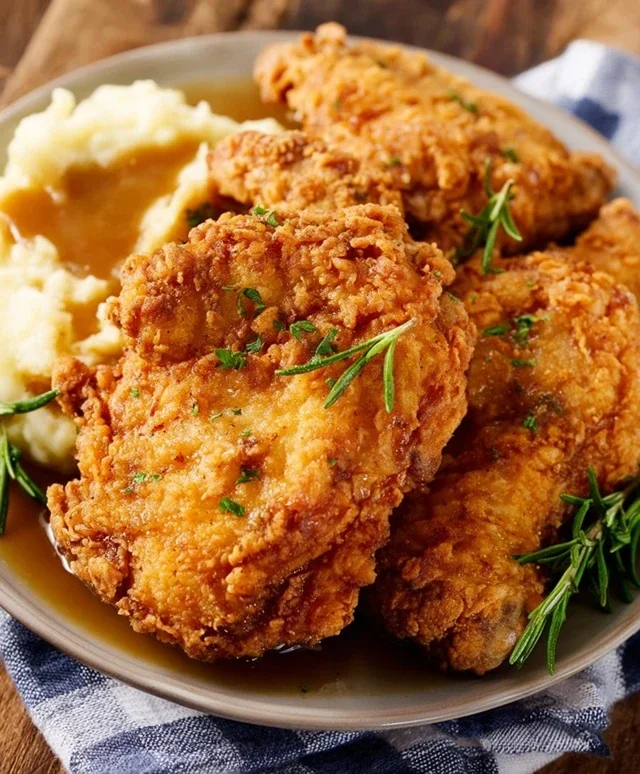
Allow your country fried chicken to rest for a few minutes after frying. This allows the juices to redistribute, ensuring a moist and tender bite. Serve it hot with your favorite sides like mashed potatoes, coleslaw, or a simple green salad. This country fried chicken is sure to be a crowd-pleaser and a new favorite in your recipe rotation. Enjoy every delicious, crispy, and juicy bite!
Conclusion:
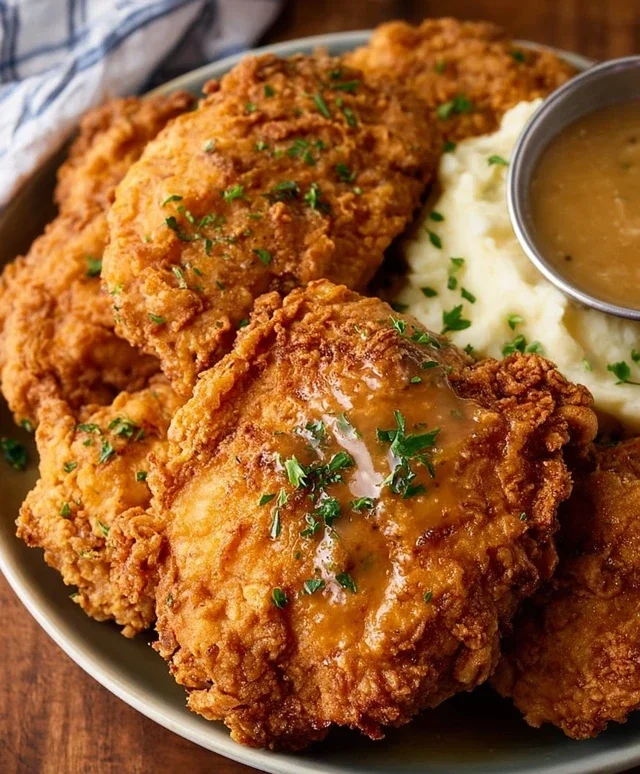
There you have it! This country fried chicken recipe is a true crowd-pleaser, delivering that perfect crispy, golden-brown exterior and incredibly juicy, tender meat with every bite. It’s the kind of dish that brings smiles to the table and makes any meal feel special. The simplicity of the dredge and the careful frying technique ensures a fantastic result, even for novice cooks. Don’t be intimidated; the payoff is absolutely worth it!
Serve this delectable country fried chicken with all your favorite Southern sides. Think creamy mashed potatoes with gravy, a vibrant coleslaw, buttery biscuits, or a fresh green bean casserole. It’s also amazing alongside mac and cheese for the ultimate comfort food feast. For those looking to spice things up, consider adding a pinch of cayenne pepper to the flour mixture or even incorporating some smoked paprika for an extra layer of flavor. You can also experiment with different herbs in your dredgin extractg for a unique twist. I truly encourage you to give this recipe a try – you won’t be disappointed!
Frequently Asked Questions:
What is the best oil for frying chicken?
A neutral-flavored oil with a high smoke point is ideal. Canola oil, vegetable oil, or peanut oil are excellent choices for achieving that perfect crispy crust without burning.
How do I prevent my fried chicken from being greasy?
Ensure your oil is hot enough before adding the chicken (around 350-375°F or 175-190°C). Don’t overcrowd the pan, as this will lower the oil temperature and lead to greasy chicken. Drain the fried chicken on a wire rack set over a baking sheet to allow excess oil to drip off.
Can I make country fried chicken ahead of time?
While it’s best enjoyed fresh for maximum crispiness, you can reheat country fried chicken. Place it on a baking sheet in a preheated oven at around 375°F (190°C) for about 10-15 minutes, or until heated through and crispy again.
Country Fried Chicken
Classic country fried chicken, featuring a crispy coating and juicy interior.
Ingredients
-
4 boneless skinless chicken breasts
-
2 cups buttermilk
-
2 large eggs
-
3 teaspoons salt
-
1 ½ cup all-purpose flour
-
½ cup breadcrumbs
-
2 ½ teaspoons seasoned salt
-
¾ teaspoon paprika
-
½ teaspoon cayenne pepper
-
1 ½ teaspoon black pepper
-
1 ½ cups vegetable oil
Instructions
-
Step 1
Cut chicken breasts into bite-sized pieces if desired, or leave whole. Place chicken in a bowl and pour buttermilk over it. Ensure chicken is fully submerged. Marinate for at least 15 minutes. -
Step 2
In a shallow dish, whisk together all-purpose flour, breadcrumbs, seasoned salt, paprika, cayenne pepper, and black pepper. Add 3 teaspoons of salt to the flour mixture. -
Step 3
Remove chicken from buttermilk, allowing excess to drip off. Dip each piece of chicken into the flour mixture, ensuring it is completely coated. Press the coating onto the chicken. -
Step 4
Heat vegetable oil in a large skillet over medium-high heat until it reaches about 350°F (175°C). Use a thermometer to ensure correct temperature. -
Step 5
Carefully place coated chicken pieces into the hot oil. Do not overcrowd the skillet. Fry chicken in batches for about 5-7 minutes per side, or until golden brown and cooked through. Internal temperature should reach 165°F (74°C). -
Step 6
Remove fried chicken from the skillet and place on a wire rack set over a baking sheet to drain excess oil. Serve hot.
Important Information
Nutrition Facts (Per Serving)
It is important to consider this information as approximate and not to use it as definitive health advice.
Allergy Information
Please check ingredients for potential allergens and consult a health professional if in doubt.