Crispy Chicken Fried Chicken Recipe
Chicken Fried Chicken. Just the name conjures up images of golden-brown perfection, doesn’t it? This isn’t just any chicken dish; it’s a culinary embrace, a hug on a plate that has captured hearts and taste buds for generations. What is it about Chicken Fried Chicken that makes it such an enduring favorite? It’s the glorious alchemy of tender, juicy chicken enveloped in a shatteringly crisp, seasoned crust, often swimming in a velvety, savory gravy. It’s the ultimate comfort food, a dish that satisfies a deep craving for something both hearty and incredibly delicious. We’re talking about a symphony of textures and flavors – the satisfying crunch giving way to succulent chicken, all brought together by that irresistible gravy. It’s a dish that feels like home, no matter where you are.
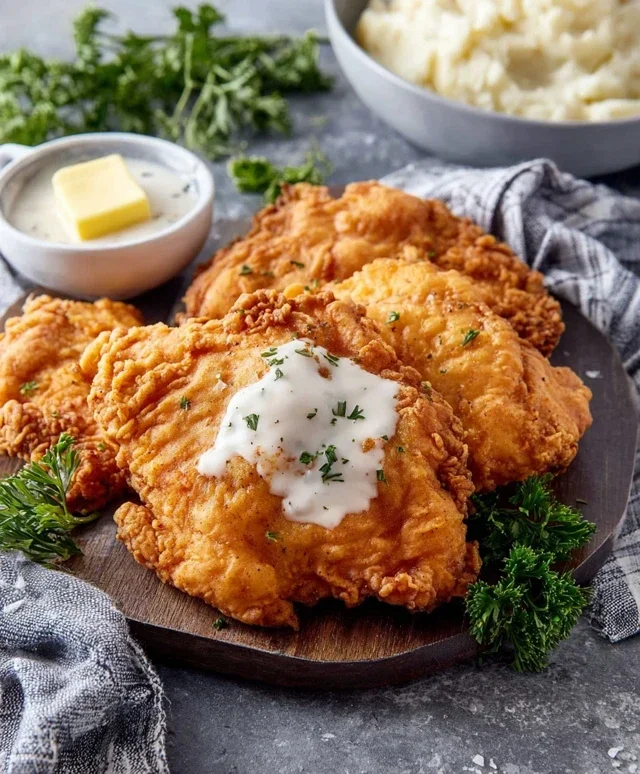
Chicken Fried Chicken
There’s something undeniably comforting about a plate of perfectly crispy, golden-brown Chicken Fried Chicken. It’s a dish that evokes warmth, family gatherings, and pure, unadulterated deliciousness. While it might seem intimidating, I’m here to show you just how achievable this classic Southern favorite is right in your own kitchen. The key lies in a few simple techniques and the right combination of ingredients to achieve that signature crunch and tender, juicy interior. Get ready to impress yourself and anyone lucky enough to share this meal with you.
Ingredients:
Preparing the Chicken
The first step in creating incredible Chicken Fried Chicken is to ensure your chicken is prepped correctly. We’re starting with thin-sliced chicken breasts. This is important because thinner pieces cook more evenly and quickly, preventing the outside from burning before the inside is cooked through. If your chicken breasts are on the thicker side, you can gently pound them to an even thickness between two pieces of plastic wrap or in a resealable bag. This not only aids in even cooking but also helps tenderize the meat.
Crafting the Breading
Now, let’s talk about that irresistible crust. In a shallow dish, we’ll combine the dry ingredients for our breading. This includes 2 cups of flour, which provides the base for our crispy coating. To this, we add 2 teaspoons of baking powder and 1 teaspoon of baking soda. These leavening agents are crucial for creating a light and airy, yet incredibly crunchy, exterior. They react with the buttermilk and create tiny pockets of air as the chicken fries, resulting in that signature, delightful texture. We’ll also add 1 teaspoon each of salt, pepper, and garlic powder for seasoned perfection. Mix these ingredients thoroughly to ensure the seasonings are evenly distributed.
The Buttermilk Bath
In a separate bowl, we’ll prepare the wet ingredients for our dredge. This is where the magic of tenderizing begin extracts. Whisk together 1 1/2 cups of buttermilk, 1 large egg, and 1 tablespoon of hot sauce. The buttermilk’s acidity works wonders in breaking down the chicken’s proteins, making it incredibly tender and moist. The egg acts as a binder, helping the breading adhere beautifully to the chicken, while the hot sauce adds a subtle kick and depth of flavor without making the chicken spicy. Submerge your prepared chicken breasts into this buttermilk mixture, ensuring each piece is well-coated. Allow the chicken to marinate for at least 30 minutes, or ideally longer, in the refrigerator. This marinating time is essential for maximum tenderness and flavor infusion.
Frying to Golden Perfection
Now for the star of the show: the frying! In a large, heavy-bottomed skillet or a Dutch oven, heat enough oil for frying over medium-high heat. You want the oil to reach around 350°F (175°C). A good test is to drop a small pinch of flour into the oil; if it sizzles immediately, your oil is ready. Carefully place the marinated chicken pieces into the hot oil, being careful not to overcrowd the pan. Overcrowding will lower the oil temperature, leading to greasy chicken instead of crispy. Fry the chicken for about 4-6 minutes per side, or until it’s a deep golden brown and cooked through. The internal temperature should reach 165°F (74°C). Remove the fried chicken from the oil and place it on a wire rack set over a baking sheet to drain any excess oil. This is far better than paper towels, which can make the bottom soggy.
Whipping Up the Gravy
No Chicken Fried Chicken is complete without a luscious, creamy gravy. Once your chicken is out of the skillet, carefully pour out most of the frying oil, leaving about 1/4 cup in the pan. Reduce the heat to medium. Whisk in 1/3 cup of flour with the reserved oil, stirring constantly for about 1-2 minutes to cook out the raw flour taste. This is your roux, the foundation of your gravy. Gradually whisk in 2 cups of milk, ensuring there are no lumps. Continue to cook and stir the gravy until it thickens to your desired consistency. Season generously with salt and pepper to taste. The starch from the flour, combined with the milk, will create a wonderfully smooth and rich gravy that perfectly complements the crispy chicken.
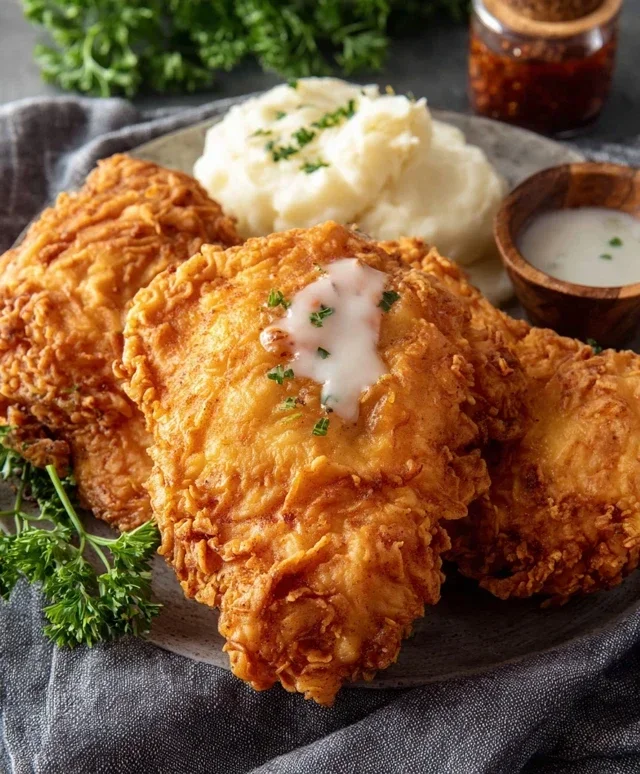
Enjoy your homemade Chicken Fried Chicken! It’s a labor of love, but one that is so incredibly rewarding. Serve it hot with plenty of gravy, and perhaps some mashed potatoes and a side of greens for a truly classic Southern meal.
Conclusion:
So there you have it – a guide to creating truly delicious Chicken Fried Chicken right in your own kitchen! This recipe is fantastic because it delivers that irresistible crispy coating and tender, juicy chicken, offering a satisfying comfort food experience that’s hard to beat. It’s the perfect centerpiece for a hearty meal and is guaranteed to impress. We’ve covered everything from perfectly pounding the chicken to achieving that golden-brown perfection. Don’t be intimidated; even if you’re new to frying, this recipe breaks it down into manageable steps. I really encourage you to give this Chicken Fried Chicken a try – you won’t regret it!
For serving, this dish shines alongside classic Southern sides like creamy mashed potatoes, buttery biscuits, and a vibrant green bean casserole. A drizzle of homemade gravy is, of course, non-negotiable! If you’re feeling adventurous, consider variations like adding a pinch of cayenne pepper to your flour dredge for a little kick, or using a buttermilk brine for extra tender chicken. The possibilities are endless!
Frequently Asked Questions:
What’s the secret to getting a super crispy coating?
The key is a two-step dredgin extractg process: first in seasoned flour, then in an egg wash, and finally back into the seasoned flour. Make sure your oil is at the correct temperature (around 350°F or 175°C) and don’t overcrowd the pan. This allows the chicken to fry evenly and achieve maximum crispiness.
Can I make Chicken Fried Chicken ahead of time?
While best enjoyed fresh, you can partially prep components. You can pound and bread the chicken a few hours in advance and refrigerate it on a wire rack. However, frying should ideally be done just before serving for optimal texture. Reheated fried chicken can sometimes lose its crispiness, but a quick stint in a hot oven or air fryer can help revive it.
Chicken Fried Chicken
A classic Southern dish featuring crispy, pan-fried chicken coated in a flavorful dredge and served with a creamy milk gravy.
Ingredients
-
6-8 thin sliced chicken breasts
-
2 cups flour
-
2 tsp baking powder
-
1 tsp baking soda
-
1 tsp salt
-
1 tsp pepper
-
1 tsp garlic powder
-
1 1/2 cup buttermilk
-
1 egg
-
1 Tbs hot sauce
-
Oil for frying
-
1/4 cup reserved oil from frying
-
1/3 cup flour
-
2 cup milk
-
Salt & pepper
Instructions
-
Step 1
In a shallow dish, whisk together 2 cups flour, baking powder, baking soda, salt, pepper, and garlic powder for the chicken coating. -
Step 2
In another shallow dish, whisk together buttermilk, egg, and hot sauce for the wet dredge. -
Step 3
Dip each chicken breast first into the buttermilk mixture, then coat thoroughly in the flour mixture, pressing to adhere. Set aside on a plate. -
Step 4
Heat enough oil in a large skillet over medium-high heat for shallow frying. Fry chicken in batches until golden brown and cooked through, about 3-4 minutes per side. -
Step 5
Remove chicken to a wire rack to drain. Reserve 1/4 cup of the frying oil in the skillet. -
Step 6
Whisk 1/3 cup flour into the reserved oil in the skillet until smooth. Cook for 1-2 minutes, stirring constantly. -
Step 7
Gradually whisk in 2 cups milk until smooth. Bring to a simmer and cook, stirring, until thickened. Season gravy with salt and pepper to taste. -
Step 8
Serve the chicken hot with the gravy.
Important Information
Nutrition Facts (Per Serving)
It is important to consider this information as approximate and not to use it as definitive health advice.
Allergy Information
Please check ingredients for potential allergens and consult a health professional if in doubt.