Perfect Grilled Pizza – Easy Recipe
How to Make the Perfect Grilled Pizza is your gateway to smoky, blistered crusts and incredibly fresh flavors that simply can’t be replicated in a conventional oven. Forget those soggy, undercooked attempts; we’re diving into the art of grilling pizza, transforming your backyard into an Italian trattoria. There’s something undeniably primal and exciting about cooking pizza directly on the grill. The intense heat creates a magnificent char on the dough, infusing it with a delicious smoky aroma that elevates every bite. People adore grilled pizza not just for its unique taste, but for the sheer joy of it. It’s an event, a reason to gather friends and family, and a chance to unleash your inner pizzaiolo. What makes this grilled pizza truly special is the incredible textural contrast: a crispy, slightly chewy base yielding to bubbling cheese and vibrant toppings. Get ready to master the techniques for a truly unforgettable experience.
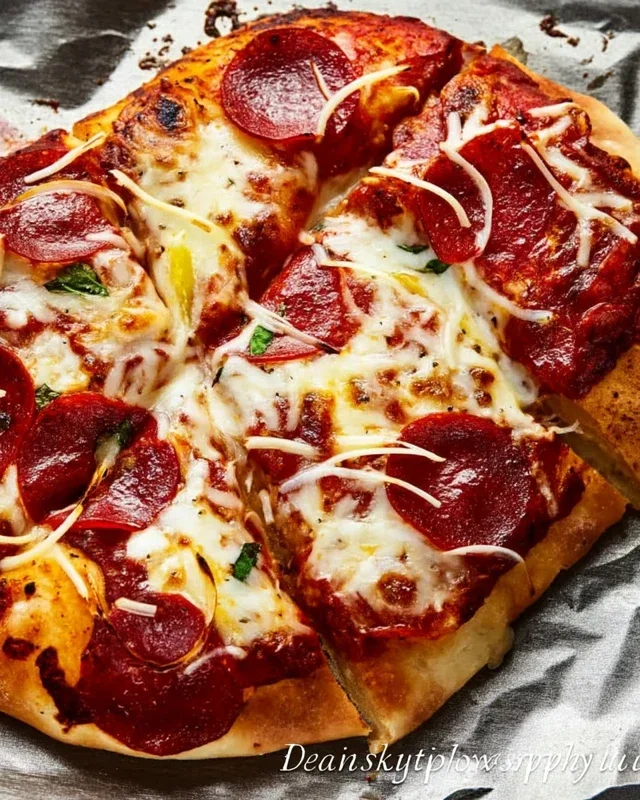
How to Make the Perfect Grilled Pizza
There’s something truly magical about grilled pizza. The high heat of the grill creates a wonderfully crispy crust with delicious char marks, while the toppings get perfectly melted and slightly smoky. Forget ordering in – making your own grilled pizza at home is surprisingly easy and incredibly rewarding. It’s a fantastic way to elevate a casual weeknight meal or impress guests at your next barbecue. We’ll walk you through the process, from preparing your dough to achieving that perfectly blistered crust.
Ingredients:
Preparing Your Dough
The foundation of a great grilled pizza is good dough. If you’re using store-bought dough, let it come to room temperature for at least 30 minutes to an hour before you plan to grill. This makes it much easier to stretch and handle without it snapping back. If you’re making your own, ensure it has had its proper rise time. A slightly wetter dough can be a bit trickier on the grill, so aim for a dough that’s firm enough to handle but still pliable.
Prepping Your Toppings
While your dough is resting, take this time to prepare all your toppings. For vegetables like mushrooms, onions, and peppers, you can either add them raw and let the grill cook them, or for a more intense flavor and softer texture, you can quickly sauté or grill them separately before adding them to your pizza. This also ensures that watery vegetables don’t make your pizza soggy. Slice your beef pepperoni thinly, gather your olives, and have your fresh basil ready to go. Remember, less is often more on a grilled pizza – don’t overload it, or it can become difficult to handle and cook evenly.
Grill Setup and Heating
This is where the magic happens! You’ll want to set up your grill for direct, high-heat cooking. For a gas grill, turn all burners to high and let it preheat for at least 10-15 minutes with the lid closed. For a charcoal grill, pile your coals to one side to create a hot zone. You’re aiming for a grill temperature of around 450-500°F (230-260°C).
Before you put any dough on the grill, you’ll want to lightly oil your grill grates. This is crucial to prevent sticking. Use a folded paper towel dipped in a high-heat oil like canola or vegetable oil, and carefully (using long tongs) wipe down the hot grates.
Grilling the Dough
This is the most delicate stage, but with a little practice, you’ll get the hang of it. Lightly flour a clean surface and gently stretch your pizza dough into your desired shape, about 1/4 to 1/2 inch thick. Don’t overwork it. Brush one side of the stretched dough liberally with olive oil.
Carefully transfer the oiled side of the dough onto the preheated grill grates, directly over the heat source. Close the lid. Let it cook for about 2-4 minutes, or until you see the underside is puffed up and has nice golden-brown grill marks. You’ll want to peek to check its progress.
Flipping and Topping
Using a long, thin spatula or pizza peel, carefully flip the grilled dough over. Now, working quickly, spread a thin layer of your pizza sauce over the grilled side. Be sure to leave a small border for the crust. Then, sprinkle generously with mozzarella cheese and arrange your prepared toppings. If you’re adding delicate ingredients like fresh basil, save those for after the pizza comes off the grill.
Close the grill lid again and let the pizza cook for another 4-6 minutes, or until the cheese is melted and bubbly, and the crust is cooked through and has those desirable char marks on the bottom. Keep an eye on it to prevent burning. If the toppings are browning too quickly, you can move the pizza to a slightly cooler part of the grill.
Finishing Touches and Serving
Once your grilled pizza is ready, carefully remove it from the grill using your spatula or pizza peel. Transfer it to a cutting board. If you like, you can drizzle a little more olive oil over the crust and sprinkle with grated Parmesan cheese and fresh basil. Let it rest for just a minute or two before slicing and serving. This allows the cheese to set slightly and makes it easier to cut.
Enjoy your perfectly grilled pizza! The smoky flavor from the grill, combined with the crispy, slightly chewy crust and your favorite toppings, is an experience that’s hard to beat. It’s a testament to how simple ingredients, prepared with care and a touch of heat, can create something truly extraordinary. Don’t be afraid to experiment with different toppings and sauces to find your ultimate grilled pizza creation!
Conclusion:
There you have it – your comprehensive guide to crafting the perfect grilled pizza! This recipe isn’t just about making a pizza; it’s about unlocking a world of smoky, crispy, and incredibly flavorful creations that simply can’t be replicated in a conventional oven. The high heat of the grill, combined with the direct flame, creates a beautifully charred crust that’s both chewy and delightfully crisp, forming the ideal foundation for your favorite toppings. The beauty of this method lies in its simplicity and its versatility. Don’t be afraid to experiment!
Serving your grilled pizza is an event in itself. Imagin extracte a vibrant Margherita with fresh basil, a spicy beef pepperoni with a drizzle of hot honey, or a sophisticated beef prosciutto and arugula creation. Pair it with a crisp green salad or some grilled vegetables for a complete meal. Remember, the possibilities for variations are endless. Consider different cheeses like smoked gouda or a creamy goat cheese. Try adding caramelized onions, roasted peppers, or even some grilled corn. The focus keyword, grilled pizza, is truly the star here, offering a unique dining experience right in your backyard.
So, dust off your grill, gather your ingredients, and embark on this delicious adventure. I encourage you to give this recipe a try; you’ll be amazed at how achievable and rewarding making the perfect grilled pizza can be. Happy grilling!
Frequently Asked Questions about Grilled Pizza:
What kind of grill is best for grilled pizza?
Both charcoal and gas grills work wonderfully for grilled pizza. A gas grill offers more precise temperature control, which can be helpful for begin extractners. A charcoal grill, on the other hand, can impart an extra layer of smoky flavor. Whichever you choose, ensure it’s clean and preheated to a medium-high heat (around 450-500°F or 230-260°C).
Can I use store-bought pizza dough?
Absolutely! While homemade dough is fantastic, store-bought dough is a perfectly acceptable and convenient option for making grilled pizza. Just let it come to room temperature for about 30 minutes before stretching it out for the best results.
How do I prevent the pizza from sticking to the grill?
The key is to have a properly preheated grill and to lightly oil both the grill grates and the dough before placing it on the grill. Once the dough has had a chance to firm up and develop grill marks (usually 2-3 minutes), it should release easily.
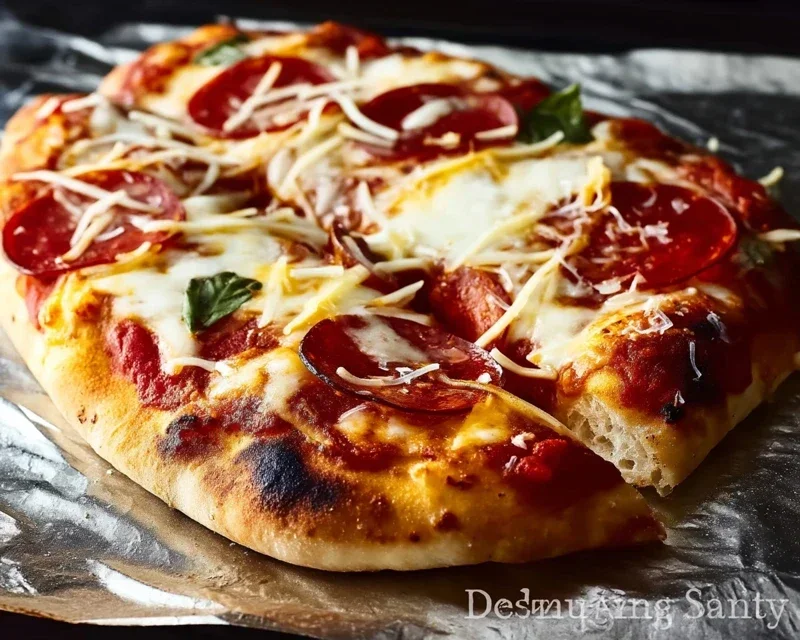
The Perfect Grilled Pizza
Master the art of outdoor pizza making on your grill for a crispy crust and delicious toppings.
Ingredients
-
1 pound pizza dough
-
1/4 cup olive oil
-
1/2 cup tomato sauce
-
1 cup shredded mozzarella cheese
-
1/2 cup sliced pepperoni
-
1/4 cup sliced mushrooms
-
1 tablespoon fresh basil, chopped
Instructions
-
Step 1
Preheat your grill to medium-high heat (around 450-500°F or 230-260°C). -
Step 2
Lightly flour a surface and stretch or roll out your pizza dough to your desired thickness, typically about 1/4 inch thick. -
Step 3
Brush one side of the pizza dough with olive oil. Place the oiled side down onto the preheated grill grates. Close the lid and cook for 2-3 minutes, until the bottom is golden brown and slightly puffed. -
Step 4
Carefully flip the pizza dough over using a spatula. Quickly spread the tomato sauce over the cooked side, leaving a small border for the crust. Sprinkle with mozzarella cheese, pepperoni, and mushrooms. -
Step 5
Close the grill lid and cook for another 5-7 minutes, or until the cheese is melted and bubbly, and the crust is fully cooked through. -
Step 6
Remove the pizza from the grill. Garnish with fresh basil. Let it cool for a minute before slicing and serving.
Important Information
Nutrition Facts (Per Serving)
It is important to consider this information as approximate and not to use it as definitive health advice.
Allergy Information
Please check ingredients for potential allergens and consult a health professional if in doubt.