Anti-Inflammatory Sweet Potato Coconut Muffins
Anti-Inflammatory Coconut and Sweet Potato Muffins are more than just a delicious breakfast or snack; they’re a gentle hug for your body. We’ve all been there, looking for ways to feel our best, and that’s where these little powerhouses come in. Imagin extracte starting your day with a muffin that’s not only incredibly satisfying but also actively works to support your well-being. People rave about these because they manage to be both comforting and nourishing, a perfect balance that’s hard to achieve. The natural sweetness of sweet potato combined with the creamy richness of coconut milk creates a flavor profile that’s simply irresistible, and the added anti-inflammatory benefits make these Anti-Inflammatory Coconut and Sweet Potato Muffins a true standout. It’s a guilt-free indulgence that tastes amazing and makes you feel even better.
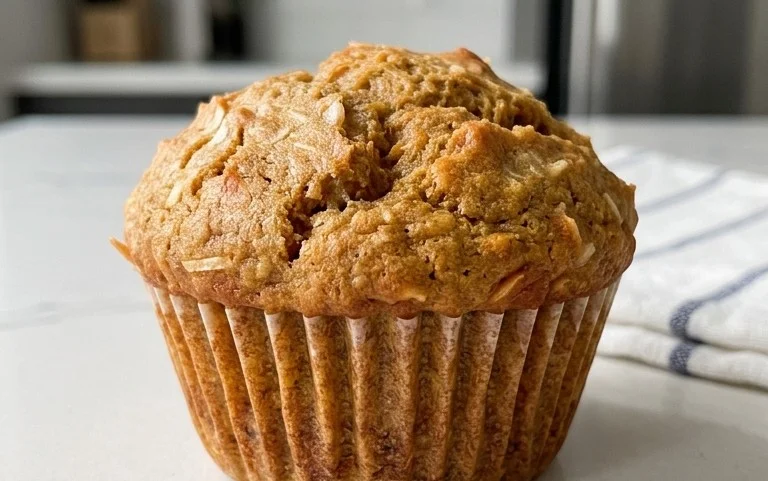
Anti-Inflammatory Coconut and Sweet Potato Muffin Recipe
Sometimes, you just need a treat that nourishes your body as much as it delights your taste buds. These Anti-Inflammatory Coconut and Sweet Potato Muffins are exactly that kind of treat. Packed with wholesome ingredients known for their soothing properties, they’re perfect for a nourishing breakfast, a satisfying snack, or even a guilt-free dessert. The natural sweetness of the sweet potato, combined with the creamy richness of coconut milk and a delightful blend of warming spices, creates a muffin that’s both comforting and incredibly flavorful. Plus, they’re surprisingly easy to whip up, making them an ideal option for busy mornings or when you’re craving something homemade and healthy. We’ve carefully selected each ingredient to contribute to the anti-inflammatory power of these muffins, making them a smart choice for anyone looking to support their well-being from the inside out.
Ingredients:
Getting Started: Preparing Your Sweet Potato
The first step to achieving wonderfully moist and flavorful muffins is to properly prepare your sweet potato. You want to ensure it’s tender enough to mash smoothly. The easiest method is to bake it. Preheat your oven to 400°F (200°C). Wash the sweet potato thoroughly, then pierce it a few times with a fork. This allows steam to escape and prevents it from exploding. Place the sweet potato directly on the oven rack or on a baking sheet lined with parchment paper. Bake for about 45-60 minutes, or until it’s very soft when pierced with a knife or skewer. The exact time will depend on the size of your sweet potato. Once it’s cooked, let it cool slightly until it’s comfortable to handle. Cut it in half and scoop out the flesh into a bowl. Mash it with a fork until it’s smooth and there are no large lumps. You should aim for about 1 cup of mashed sweet potato. If you’re short on time, you can also peel and dice the sweet potato, then steam or boil it until tender, but baking tends to concentrate the flavor and sweetness.
Creating the Wet Base
Once your sweet potato is mashed and slightly cooled, it’s time to combine the wet ingredients. In a large mixing bowl, add the mashed sweet potato. Now, let’s prepare our flaxseed egg. In a small bowl or ramekin, combine 1 tablespoon of ground flaxseed with 2.5 tablespoons of water. Stir it well and let it sit for about 5-10 minutes. It will thicken and develop a gel-like consistency, mimicking the binding properties of a traditional egg. Add this flaxseed egg to the bowl with the mashed sweet potato. Next, pour in the 3/4 cup of canned coconut milk. For the best results and richness, I recommend using full-fat canned coconut milk. Then, add 2 tablespoons of olive oil. Extra virgin extract olive oil is a great choice here for its health benefits and subtle flavor. Finally, add your sweetener. I’ve suggested 1/2 cup of pure maple syrup or raw, unpasteurized honey. Both offer a wonderful sweetness and contain beneficial properties. Stir all of these wet ingredients together thoroughly until they are well combined and the mixture is smooth and creamy. Ensure there are no streaks of coconut milk or separate pockets of sweet potato.
Combining the Dry Elements
In a separate medium-sized bowl, whisk together all the dry ingredients. This helps to evenly distribute the leavening agents and spices, ensuring your muffins rise properly and are consistently flavorful. You’ll need 1 cup of organic brown rice flour. Brown rice flour provides a good gluten-free base. Then, add 1/4 cup of organic coconut flour. Coconut flour is very absorbent, so using it in moderation is key. Next, add 1 tablespoon of aluminum-free baking powder. Baking powder is crucial for lift, and using an aluminum-free version is a good choice for those sensitive to it. Sprinkle in 1/2 teaspoon of sea salt. Salt enhances all the other flavors and balances the sweetness. Now for the star anti-inflammatory spices: 1 tablespoon of cinnamon powder, 1 tablespoon of gin extractger powder, and 1 teaspoon of turmeric powder. Turmeric, in particular, is renowned for its potent anti-inflammatory benefits. Finally, add a touch of warmth with 1/8 teaspoon each of ground cloves and ground nutmeg. Whisk these dry ingredients together vigorously for at least 30 seconds to ensure everything is perfectly integrated.
Bringin extractg It All Together and Baking
Now it’s time to combine the wet and dry ingredients. Pour the dry ingredients into the bowl containing the wet ingredients. Using a spatula or wooden spoon, gently fold the ingredients together until just combined. Be careful not to overmix! Overmixing can develop the gluten in the flour (even in gluten-free flours, this can happen to some extent) and result in tougher muffins. It’s perfectly fine if there are a few small lumps; a slightly lumpy batter is often a sign of a well-mixed muffin batter. Once everything is just incorporated, the batter should be thick but pourable.
Preheat your oven to 375°F (190°C). Prepare a standard muffin tin by lining it with muffin liners or greasing it well. Spoon the batter evenly into the prepared muffin cups, filling each one about two-thirds to three-quarters full. This recipe typically yields about 12 muffins, depending on your muffin tin size and how full you fill them.
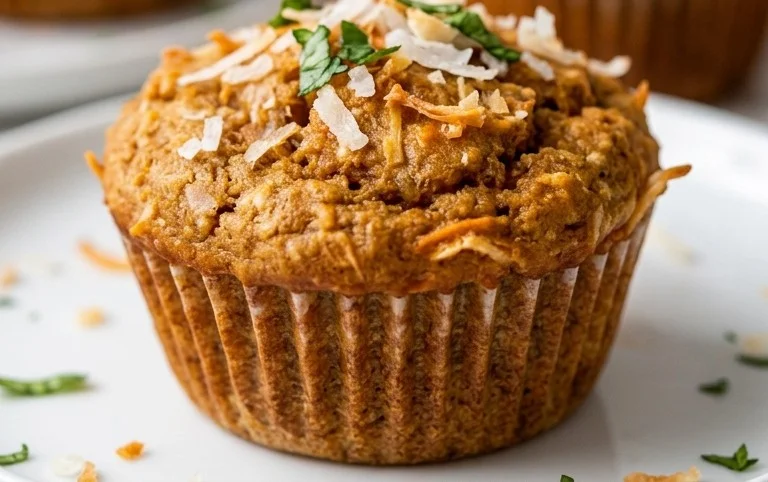
Bake the muffins for 20-25 minutes, or until a toothpick inserted into the center of a muffin comes out clean. The tops should be golden brown and spring back slightly when gently touched. Once baked, remove the muffin tin from the oven and let the muffins cool in the tin for about 5-10 minutes. This allows them to set up properly before you transfer them to a wire rack to cool completely. Enjoy these delicious and nourishing muffins warm or at room temperature. They store well in an airtight container at room temperature for a couple of days, or in the refrigerator for up to a week. For longer storage, you can freeze them!
Conclusion:
I hope you’re as excited to try these Anti-Inflammatory Coconut and Sweet Potato Muffins as I am to share them! They truly are a fantastic way to start your day or enjoy a wholesome snack. Packed with the goodness of sweet potatoes, which offer anti-inflammatory benefits, and the richness of coconut milk for healthy fats, these muffins are not only delicious but also incredibly nourishing. The subtle sweetness and comforting aroma will fill your kitchen with warmth.
These versatile muffins are perfect on their own for a quick breakfast grab-and-go, or you can elevate them by serving them warm with a dollop of Greek yogurt and a sprinkle of toasted coconut flakes. They also pair beautifully with a cup of herbal tea. Don’t be afraid to get creative with variations! You could add a pinch of cinnamon or nutmeg for extra spice, or stir in some chia seeds or flaxseeds for an added nutritional boost. For a bit of texture, consider adding a handful of chopped pecans or walnuts.
I truly encourage you to give this recipe a try. It’s a simple yet effective way to incorporate more anti-inflammatory ingredients into your diet without sacrificing flavor. Enjoy the process and savor the delicious results!
Frequently Asked Questions:
Can I make these muffins ahead of time?
Absolutely! These muffins store wonderfully. Once cooled completely, you can keep them in an airtight container at room temperature for up to 2 days, or in the refrigerator for up to 4-5 days. For longer storage, they freeze exceptionally well. Just wrap them individually in plastic wrap and then place them in a freezer-safe bag for up to 3 months. Thaw overnight in the refrigerator or warm them gently in a toaster oven or microwave.
Are these muffins gluten-free?
The base recipe, as written, is not gluten-free. However, you can easily make them gluten-free by substituting a gluten-free all-purpose flour blend for the all-purpose flour called for in the recipe. Ensure your blend contains xanthan gum, or add it according to the blend’s recommendations, to help with binding.
Anti-Inflammatory Coconut and Sweet Potato Muffin Recipe
Delicious and healthy muffins packed with anti-inflammatory ingredients like sweet potato, turmeric, and ginger. Perfect for a nutritious breakfast or snack.
Ingredients
-
1 small sweet potato (about 1 cup packed)
-
3/4 cup canned coconut milk
-
1 flaxseed “egg” (1 tbsp. ground flax mixed with 2.5 tbsp. water)
-
2 tbsp. olive oil
-
1/2 cup pure maple syrup or raw, unpasteurized honey
-
1 cup organic brown rice flour
-
1/4 cup organic coconut flour
-
1 tbsp. aluminum-free baking powder
-
1/2 tsp. sea salt
-
1 tbsp. cinnamon powder
-
1 tsp. ginger powder
-
1 tsp. turmeric powder
-
1/8 tsp. ground cloves
-
1/8 tsp. ground nutmeg
Instructions
-
Step 1
Preheat oven to 375°F (190°C). Line a 12-cup muffin tin with paper liners or grease well. -
Step 2
Mash the cooked sweet potato until smooth. In a large bowl, combine the mashed sweet potato, coconut milk, flaxseed egg, olive oil, and maple syrup (or honey). Whisk until well combined. -
Step 3
In a separate bowl, whisk together the brown rice flour, coconut flour, baking powder, sea salt, cinnamon, ginger powder, turmeric powder, ground cloves, and ground nutmeg. -
Step 4
Gradually add the dry ingredients to the wet ingredients, stirring until just combined. Do not overmix. -
Step 5
Divide the batter evenly among the prepared muffin cups, filling each about two-thirds full. -
Step 6
Bake for 20-25 minutes, or until a toothpick inserted into the center of a muffin comes out clean. -
Step 7
Let the muffins cool in the tin for a few minutes before transferring them to a wire rack to cool completely.
Important Information
Nutrition Facts (Per Serving)
It is important to consider this information as approximate and not to use it as definitive health advice.
Allergy Information
Please check ingredients for potential allergens and consult a health professional if in doubt.