Dairy Free Pesto – Easy Vegan Basil Sauce Recipe
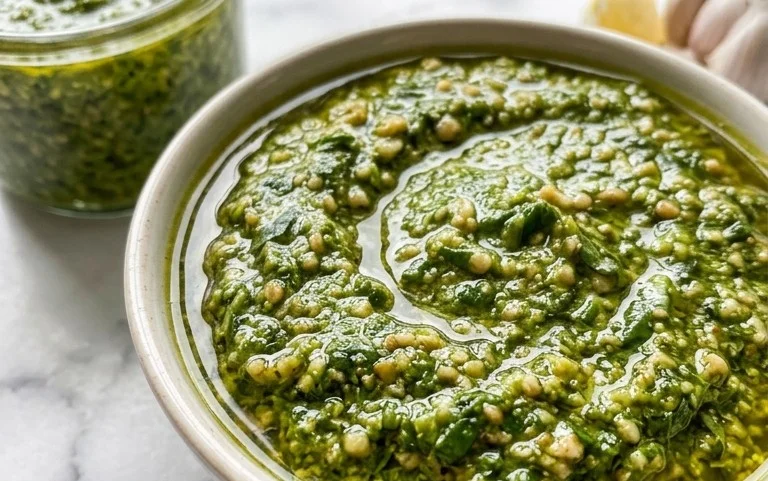
Dairy Free Pesto is a revelation, a vibrant green sauce that bursts with fresh, herbaceous flavor and a delightful creaminess, all without a drop of dairy. For so long, pesto was synonymous with Parmesan cheese, but I’m here to tell you that you can achieve that same satisfying richness and complexity in a completely dairy-free way. We all love pesto for its versatility – it’s the perfect accompaniment to pasta, a game-changer for sandwiches, an incredible dip, and a zesty topping for grilled vegetables. But what truly makes this dairy free pesto recipe special is its ability to deliver all that beloved pesto goodness while being inclusive and wonderfully light. It’s a celebration of fresh basil, toasted nuts, garlic, and good olive oil, proving that you don’t need cheese to create something truly spectacular. Get ready to fall in love with this incredible, adaptable sauce all over again.
Dairy Free Pesto
Hello pesto lovers! If you’re looking for a vibrant, flavorful, and completely dairy-free pesto recipe, you’ve come to the right place. Traditional pesto is a masterpiece, but sometimes you want that same punch of herbaceous goodness without the cheese. This dairy-free version delivers all the bright, garlicky, nutty notes you crave, and it’s incredibly versatile. Whether you’re tossing it with pasta, spreading it on sandwiches, or using it as a dip, this pesto is a game-changer. I’ve found that a little nutritional yeast adds a fantastic umami depth that can mimic the cheesy notes of traditional pesto, but feel free to experiment! Let’s get blending!
Ingredients:
Making Your Dairy-Free Pesto
The beauty of pesto is its simplicity. You can whip up a batch in minutes, and the fresh ingredients truly shine. My preferred method is using a food processor, as it’s the quickest and most efficient way to achieve that perfect pesto consistency. However, if you’re feeling ambitious and want to channel your inner Italian nonna, a mortar and pestle will also work, though it will take a bit more elbow grease! Let’s dive into the steps.
Step 1: Prepare Your Basil
Start by ensuring your basil is clean and dry. I like to wash my basil leaves gently and then pat them thoroughly dry with paper towels or use a salad spinner. Excess water can make your pesto watery and dull its vibrant green color. Once dry, remove the basil leaves from their stems. The stems can sometimes be a bit tough and stringy, so focusing on just the leaves will give you the smoothest texture. You’ll want to pack your basil leaves into the measuring cup – this means pressing them down a bit to get a good three cups. Don’t be shy; basil wilts down significantly when processed.
Step 2: Toast Your Nuts (Optional but Recommended!)
This step is optional, but I highly recommend it for an extra layer of flavor. Toasting your pine nuts (or walnuts/pumpkin seeds) brings out their natural oils and adds a wonderful depth and richness to the pesto. To toast them, spread your nuts in a single layer on a dry skillet over medium-low heat. Stir them frequently to prevent burning. They’re ready when they become fragrant and lightly golden brown, which usually takes about 3-5 minutes. Keep a close eye on them, as nuts can go from perfectly toasted to burnt very quickly. Once toasted, let them cool completely before adding them to the food processor. If you’re using pre-ground nuts, you can skip this step, but whole nuts that you toast yourself offer superior flavor.
Step 3: Combine the Dry Ingredients and Aromatics
In the bowl of your food processor, add the toasted (and cooled) pine nuts, minced garlic cloves, and the optional nutritional yeast if you’re using it. Pulse these ingredients a few times until they are roughly chopped and combined. You don’t want a fine powder here; just a coarse meal is perfect. If you are omitting the nutritional yeast and planning to add parmesan cheese for a non-dairy-free version (or if you just don’t have it), you would add it at this stage as well.
Step 4: Add the Basil and Lemon Juice
Now it’s time to add the star of the show: the basil! Add your packed basil leaves to the food processor. Pour in the fresh lemon juice. The lemon juice not only adds a bright, zesty flavor that cuts through the richness of the olive oil but also helps to preserve the vibrant green color of the basil. If you’re not a fan of citrus, you can reduce the amount of lemon juice, but I find it truly elevates the pesto.
Step 5: Process and Emulsify
With the food processor running on low speed, slowly drizzle in the extra virgin extract olive oil through the feed tube. Continue processing until the mixture starts to come together and forms a coarse paste. You’re looking for a consistency that’s spreadable but still has a little texture. Don’t over-process it into a completely smooth puree; a little bit of texture is desirable for pesto. Scrape down the sides of the food processor bowl as needed to ensure all the ingredients are incorporated.
Step 6: Season and Adjust
Once your pesto has reached your desired consistency, add the salt. Pulse a few more times to combine. Taste your pesto and adjust the seasoning as needed. You might want a little more salt, a touch more lemon juice for brightness, or even a pinch of red pepper flakes for a hint of heat. If you find it a bit too thick, you can add another tablespoon of olive oil and pulse again until you reach your preferred consistency. This dairy-free pesto is now ready to be enjoyed!
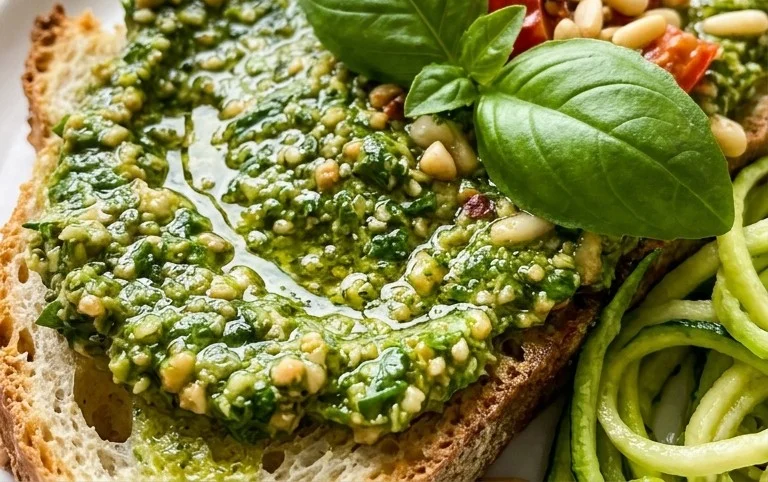
Store your homemade dairy-free pesto in an airtight container in the refrigerator for up to a week. To keep it looking its best and prevent browning, you can pour a thin layer of olive oil over the top before sealing. This delicious, vibrant pesto is perfect for pasta, as a spread on bruschetta, dolloped on grilled vegetables, or even mixed into dips and salad dressings. Enjoy the fresh, homemade flavor!
Conclusion:
There you have it! Crafting a vibrant and flavorful dairy free pesto is incredibly simple, opening up a world of delicious possibilities without the need for traditional cheese. This recipe is fantastic because it delivers all the bright, herbaceous goodness you expect from pesto, while being suitable for those with dairy allergies or a vegan lifestyle. It’s a true crowd-pleaser, proving that you don’t need dairy to achieve incredible taste and texture.
The versatility of this dairy free pesto is truly remarkable. I love tossing it with hot pasta for a quick and satisfying meal, spreading it on crusty bread for an appetizer, or using it as a base for dips and marinades. Don’t hesitate to experiment with different nuts like walnuts or almonds, or add a pinch of red pepper flakes for a little heat. Get creative and make this recipe your own!
I truly encourage you to give this dairy free pesto a try. It’s a game-changer for anyone looking for delicious, plant-based alternatives. Happy cooking!
Frequently Asked Questions about Dairy Free Pesto:
Can I freeze this dairy free pesto?
Absolutely! This dairy free pesto freezes beautifully. You can portion it into ice cube trays and freeze them. Once frozen, transfer the pesto cubes to a freezer-safe bag or container. This makes it super convenient to grab a small amount whenever you need it. It should stay fresh in the freezer for up to 3-4 months.
What can I use instead of pine nuts?
Pine nuts can be pricey and some people have allergies, so there are great alternatives! Walnuts are a very common and delicious substitute, offering a slightly earthier flavor. Almonds are another fantastic option, providing a milder, buttery taste. Even sunflower seeds or pepitas (pumpkin seeds) can work well if you’re looking for a nut-free version.
How long does this dairy free pesto last in the refrigerator?
When stored properly in an airtight container in the refrigerator, this dairy free pesto will typically last for about 5-7 days. To help preserve its freshness, you can pour a thin layer of olive oil over the top before sealing the container. This creates a barrier that helps prevent oxidation and keeps the pesto looking and tasting its best.
Dairy Free Pesto
A vibrant and flavorful dairy-free pesto recipe perfect for pasta, sandwiches, or dips. Easily customizable with your favorite nuts or seeds.
Ingredients
-
3 cups basil
-
1/2 lemon (juiced)
-
1/2 cup pine nuts
-
2 cloves garlic
-
1/4 cup olive oil
-
1/2 tsp salt
-
2 tbsp nutritional yeast
Instructions
-
Step 1
Combine basil, pine nuts, garlic, salt, and nutritional yeast in a food processor. -
Step 2
Pulse until ingredients are roughly chopped. -
Step 3
Slowly drizzle in the olive oil while the food processor is running, until the pesto is smooth and well combined. -
Step 4
Add the lemon juice and pulse a few more times to incorporate. -
Step 5
Taste and adjust seasoning with more salt or lemon juice if needed. -
Step 6
Transfer pesto to an airtight container and store in the refrigerator. It can also be frozen for longer storage.
Important Information
Nutrition Facts (Per Serving)
It is important to consider this information as approximate and not to use it as definitive health advice.
Allergy Information
Please check ingredients for potential allergens and consult a health professional if in doubt.