Bunny Rabbit Cake Recipe – Cute & Easy Easter Dessert
Bunny Rabbit Cake is more than just a dessert; it’s a heartwarming tradition, a symbol of springtime joy, and the undeniable star of Easter celebrations! There’s something inherently magical about a cake shaped and decorated to resemble a fluffy, adorable bunny. It’s no wonder this delightful creation consistently captures hearts, both young and old. The anticnon-alcoholic ipation of seeing that sweet face emerge from the oven, ready to be adorned with frosting ears and a little cotton tail, is a feeling I cherish every year. What truly makes our Bunny Rabbit Cake so special isn’t just its charming appearance, but the memories it helps create. It’s the centerpiece of family gatherings, the silent promise of deliciousness, and a guaranteed smile-inducer. Join me as we hop into creating our very own show-stopping Bunny Rabbit Cake that will be the talk of your next special occasion!
Here’s the main content for a recipe article about a Bunny Rabbit Cake:
The Most Adorable Bunny Rabbit Cake You’ll Ever Bake!
Get ready to hop into some serious baking fun with this incredibly cute Bunny Rabbit Cake! Perfect for Easter, birthdays, or just because you want to bring a smile to someone’s face, this cake is surprisingly easy to make and always a showstopper. Imagin extracte a fluffy, delicious cake transformed into an irresistible bunny with soft fondant ears and a sweet little nose. It’s a project that’s as enjoyable to create as it is to devour. Don’t worry if you’re not a professional baker; this recipe is designed to be approachable and rewarding. We’ll guide you through each step, ensuring your bunny turns out perfectly plump and charming. Let’s get started and bake some magic!
Ingredients:
Baking the Cake Layers
The foundation of our adorable bunny is a delicious, moist cake. We’ll be using a simple vanilla cake recipe that bakes up beautifully and is sturdy enough to be shaped.
Assembling and Decorating Your Bunny
Now for the fun part – transforming these simple cake rounds into a darling bunny!
Step 1: Creating the Bunny Shape
Once your cake layers are completely cool, we’ll start shaping our bunny. You’ll need a flat serving platter or cake board. Place one of the cake layers on the serving platter. This will be the body of our bunny. Take the second cake layer and carefully cut it in half. These two semi-circles will become the bunny’s ears.
Step 2: Frosting the Base
Apply a thin, even layer of buttercream frosting all over the cake body. This crum extractb coat is essential for sealing in any loose crum extractbs and providing a smooth surface for our fondant. You don’t need to make it perfect at this stage; it’s just a base. Once the crum extractb coat is applied, chill the cake for about 15-20 minutes in the refrigerator. This will firm up the frosting and make it much easier to work with.
Step 3: Sculpting and Covering with Fondant
Take about half of your white fondant and roll it out on a surface lightly dusted with powdered sugar until it’s about ¼ inch thick. This will be used to cover the body of the bunny. Carefully drape the fondant over the cake body, gently smoothing it down and tucking the edges underneath to create a clean finish. You can use a fondant smoother for a professional look, or simply use your hands. Now, take the remaining white fondant and roll out two long, thin oval shapes for the ears. Shape them slightly to resemble bunny ears, making one end a bit thicker to attach to the head.
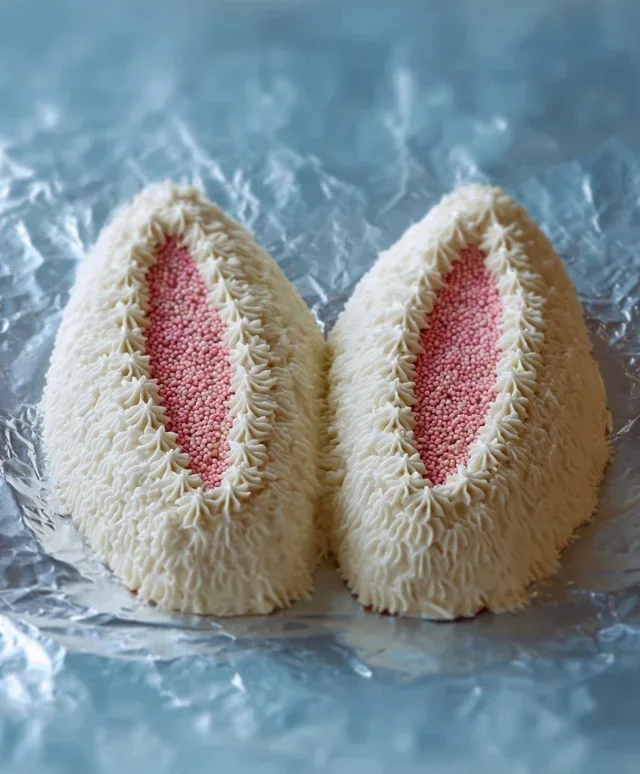
Step 4: Adding the Pink to the Ears
For the inner part of the bunny’s ears, take a small portion of your white fondant and knead in a few drops of pink food coloring until you achieve a soft, rosy pink hue. Roll this pink fondant out thinly and cut out two smaller oval shapes that will fit inside your white ear shapes. Attach the pink fondant pieces to the white ear shapes using a tiny bit of water or edible glue. Then, attach the completed ears to the sides of the bunny’s head by gently pressing them into the frosted cake. You might want to prop them up slightly with some small pieces of parchment paper while the frosting sets.
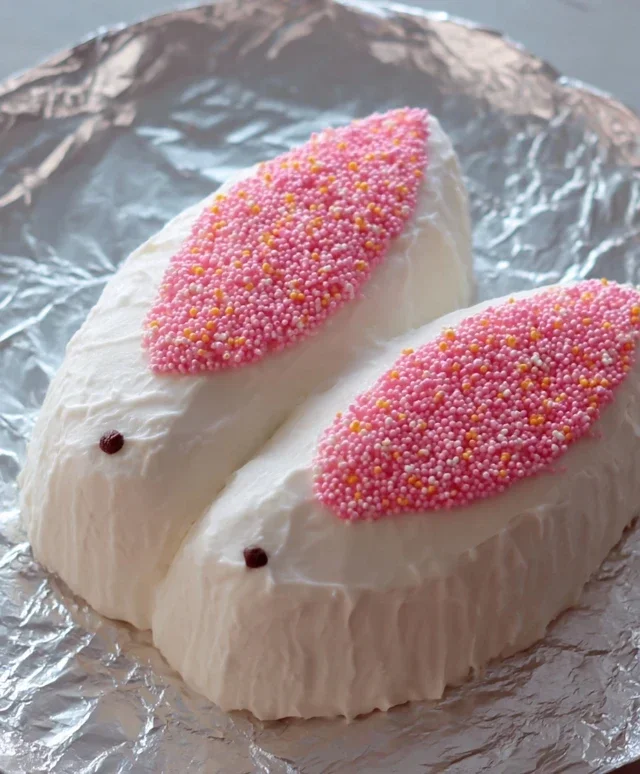
Step 5: The Finishing Touches
Now, let’s bring our bunny to life with a sweet face. Roll a small ball of white fondant for the bunny’s tail and attach it to the back of the cake. For the nose, take a small piece of pink fondant and shape it into a triangle. Attach it to the front of the bunny’s face. For the whiskers and eyes, you can either use a small amount of black fondant, rolled into very thin strands for whiskers and tiny circles for eyes, or you can use edible black marker. Carefully place the whiskers extending from the nose area and the eyes above the nose. Admire your adorable creation! This Bunny Rabbit Cake is ready to be the star of any celebration. Enjoy every delicious and delightful bite!
Conclusion:
And there you have it – your very own delightful Bunny Rabbit Cake! This recipe is truly a joy to make, offering a wonderful balance of simple steps and a show-stopping result. The moist cake, combined with the creamy frosting and adorable decorations, makes it a guaranteed hit for any celebration, especially Easter or a child’s birthday. It’s a fantastic way to add a personal, homemade touch to your special occasions, and the smiles it brings are absolutely priceless.
Serving this charming bunny cake is a treat in itself. It’s perfect as the centerpiece for your dessert table, sliced into generous portions for everyone to enjoy. Consider pairing it with a scoop of vanilla ice cream or some fresh berries for an extra burst of flavor and texture. For variations, feel free to experiment with different cake flavors like chocolate or lemon, or even use a cream cheese frosting for a tangy twist. Don’t be afraid to get creative with the decorations – sprinkles, edible glitter, or even candy eyes can add unique personality to your bunny!
I truly encourage you to give this Bunny Rabbit Cake recipe a try. It’s more accessible than you might think and the process is incredibly rewarding. Baking this cake is an experience that fosters creativity and brings joy, so don’t hesitate to embark on this sweet adventure!
Frequently Asked Questions:
Can I make this cake ahead of time?
Absolutely! You can bake the cake layers a day in advance and store them tightly wrapped at room temperature. The frosting can also be made ahead and refrigerated; just bring it back to room temperature and give it a good whisk before frosting the cooled cake. This is a great way to reduce stress on the day of your event!
What kind of frosting is best for decorating?
A stable buttercream frosting is ideal for decorating this cake. It holds its shape well, making it easier to create the bunny’s features like the ears, nose, and fluffy tail. American buttercream is a popular and easy choice, but a Swiss meringue buttercream would also work beautifully and offer a silkier texture.
How can I make the bunny’s ears stand up straight?
For perfectly upright ears, I recommend chilling them for about 15-20 minutes after shaping and frosting them, before attaching them to the cake. You can also insert a toothpick or a small dowel rod into the base of each ear and then into the cake to provide extra support. Ensure the cake itself is well-chilled before attaching the ears for the best stability.
Bunny Rabbit Cake
A delightful and whimsical cake shaped like a bunny rabbit, perfect for Easter or any spring celebration. This recipe yields a moist and tender cake adorned with creamy frosting.
Ingredients
-
2 1/4 cups all-purpose flour
-
1 1/2 cups granulated sugar
-
2 1/2 teaspoons baking powder
-
1/2 teaspoon salt
-
1/2 cup unsalted butter, softened
-
2 large eggs
-
1 cup milk
-
1 teaspoon vanilla extract
-
1/4 cup vegetable oil
-
1/4 cup sour cream
Instructions
-
Step 1
Preheat oven to 350°F (175°C). Grease and flour a 9-inch round cake pan and a 3-cup oven-safe bowl for the bunny’s head. You can also use a bunny-shaped cake pan if available. -
Step 2
In a large bowl, whisk together the flour, sugar, baking powder, and salt. Add the softened butter and mix on low speed until the mixture resembles coarse crumbs. -
Step 3
In a separate bowl, whisk together the eggs, milk, vanilla extract, vegetable oil, and sour cream. -
Step 4
Gradually add the wet ingredients to the dry ingredients, mixing on medium speed until just combined. Do not overmix. -
Step 5
Pour the batter evenly into the prepared cake pan and bowl. Bake for 30-35 minutes, or until a wooden skewer inserted into the center comes out clean. Let cool in the pans for 10 minutes before inverting onto a wire rack to cool completely. -
Step 6
Once completely cooled, assemble the bunny by placing the larger round cake on a serving platter for the body and positioning the bowl-shaped cake on top for the head. Trim and shape if necessary. -
Step 7
Decorate the cake with your favorite frosting, shaping it to resemble a bunny’s ears, nose, and whiskers. Use candies or edible markers for facial features.
Important Information
Nutrition Facts (Per Serving)
It is important to consider this information as approximate and not to use it as definitive health advice.
Allergy Information
Please check ingredients for potential allergens and consult a health professional if in doubt.