Easy St. Patrick’s Day Desserts – Green & Festive Treats
St. Patrick’s Day Desserts are more than just a sweet treat; they’re a vibrant celebration of Irish culture, a touch of whimsy, and a guaranteed way to bring a smile to everyone’s face. As the emerald isle beckons, we find ourselves drawn to the delightful possibilities of green, gold, and all things festive. There’s something inherently joyous about transforming classic desserts into playful St. Patrick’s Day creations. Whether it’s the vibrant hue of mint and matcha, the sparkle of edible glitter, or the comforting embrace of creamy, rich flavors, these desserts capture the spirit of the holiday perfectly. People adore them because they’re fun, easy to share, and add an extra layer of magic to the festivities. What truly makes these St. Patrick’s Day Desserts special is their ability to unite us in a shared moment of delicious revelry, making any gathering feel a little more magical and a lot more green.
St. Patrick’s Day Desserts: A Touch of Green for Your Celebration
This St. Patrick’s Day, let’s go beyond the usual green non-alcoholic beer and embrace the spirit with some delightful and festive desserts! I’ve put together a collection of sweet treats that are not only bursting with St. Paddy’s Day cheer but are also incredibly delicious and surprisingly easy to make. Whether you’re hosting a lively gathering or just want to add a little festive flair to your family’s evening, these recipes are sure to be a hit. We’ll be focusing on vibrant green hues and classic Irish-inspired flavors that will have everyone feeling lucky. Get ready to sprinkle some magic into your kitchen!
Ingredients:
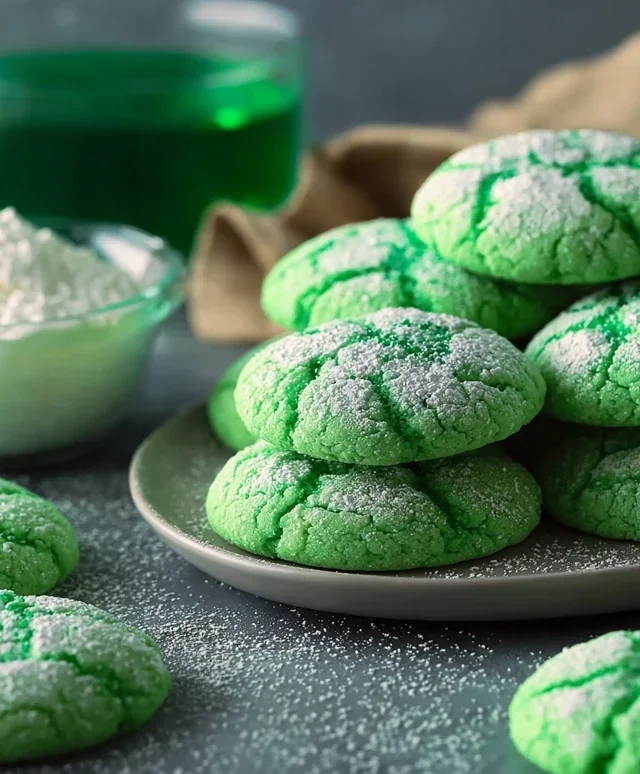
Phase 1: Crafting Our Lucky Green Cookies
Our St. Patrick’s Day dessert journey begin extracts with a batch of cheerful green sugar cookies. These are the perfect canvas for all sorts of festive decorations and are a crowd-pleaser for all ages.
Step 1: Creaming the Butter and Sugar
First, in a large mixing bowl, cream together 1 cup of softened unsalted butter and 1.5 cups of granulated sugar. I like to use a stand mixer for this, but a hand mixer or even a good old-fashioned whisk and some elbow grease will do the trick. Creaming until the mixture is light and fluffy incorporates air, which is key for tender cookies. This process usually takes about 3-5 minutes.
Step 2: Adding Wet Ingredients and Color
Next, beat in 2 large eggs, one at a time, ensuring each egg is fully incorporated before adding the next. Then, stir in 1 teaspoon of vanilla extract. Now for the fun part – the green! Add a few drops of green food coloring. Start with 5-10 drops and mix well. You can always add more to achieve your desired shade of emerald green. A vibrant green will really make these cookies pop for St. Patrick’s Day.
Step 3: Combining Dry Ingredients and Forming the Dough
In a separate medium bowl, whisk together 2.5 cups of all-purpose flour, 1 teaspoon of baking powder, and 0.5 teaspoon of salt. Gradually add the dry ingredients to the wet ingredients, mixing on low speed until just combined. Be careful not to overmix, as this can lead to tough cookies. The dough will be soft at this stage. If it seems too sticky to handle, you can add another tablespoon or two of flour, but generally, it should be manageable.
Step 4: Chilling and Cutting the Dough
Divide the dough in half, flatten each half into a disc, wrap tightly in plastic wrap, and refrigerate for at least 1 hour. This chilling step is crucial; it firms up the butter, making the dough easier to roll and cut, and it also helps prevent the cookies from spreading too much while baking. Once chilled, preheat your oven to 375°F (190°C). Lightly flour your work surface and a rolling pin. Roll out the dough to about ¼-inch thickness. Using your sbeef hamrock-shaped cookie cutters, cut out as many shapes as you can. Gather and re-roll scraps as needed, but try not to overwork the dough. Place the cut-out cookies onto a baking sheet lined with parchment paper, leaving about 1-inch of space between them.
Step 5: Baking and Decorating Your Green Delights
Bake for 8-10 minutes, or until the edges are lightly golden. The centers should still look soft; they will firm up as they cool. Let the cookies cool on the baking sheet for a few minutes before transferring them to a wire rack to cool completely. Once cooled, it’s time to decorate!
Phase 2: Whipping Up a Festive Frosting
A simple yet delicious frosting will elevate these cookies. I’m opting for a cream cheese frosting with a hint of Irish cream for an extra special touch.
Step 6: Making the Cream Cheese Frosting
In a large bowl, beat together 4 ounces of softened cream cheese with ½ cup of softened unsalted butter until smooth and creamy. Gradually beat in 3 cups of powdered sugar, alternating with 2-3 tablespoons of milk, until you reach your desired consistency. If you’re feeling adventurous and want a subtle Irish flavor, add 1 tablespoon of Irish cream liqueur extract. Beat in ½ teaspoon of vanilla extract. For a minty twist, you can also add a few drops of mint extract and some crushed mint candies to a portion of the frosting. Color a small portion of the frosting green with food coloring if you want to add a contrasting green detail or if your cookie dough wasn’t as vibrantly colored as you’d hoped.
Step 7: Decorating Your St. Patrick’s Day Cookies
Once the cookies are completely cool, spread or pipe the frosting onto the cookies. You can use a spatula for a rustic look or a piping bag with a star tip for more intricate designs. Sprinkle with green sprinkles, crushed mint candies, or even some melted white chocolate drizzles for extra flair. Let the frosting set before stacking or serving.
Phase 3: Indulgin extractg in Chocolate Mint Goodies
For a richer, more decadent treat, we’ll whip up some quick and easy chocolate mint cookies with a delightful crunch.
Step 8: Melting and Mixing for Chocolate Mint Cookies
In a heatproof bowl set over a saucepan of simmering water (or in the microwave at 30-second intervals), melt 1.5 cups of white chocolate chips. Once melted and smooth, stir in 2 tablespoons of unsalted butter until fully incorporated. Remove from heat and stir in ½ teaspoon of mint extract. Add ½ cup of chocolate chips and ½ cup of crushed mint-flavored candies. Mix everything together until the chocolate chips and candies are evenly distributed.
Step 9: Forming and Chilling the Chocolate Mint Cookies
Drop spoonfuls of the mixture onto a baking sheet lined with parchment paper. You can make them small clusters or larger cookies. This mixture doesn’t spread much, so you can place them fairly close together. Once you’ve formed all your cookies, place the baking sheet in the refrigerator for at least 30 minutes, or until the cookies are firm and set. This no-bake method is fantastic for a quick dessert!
Step 10: Adding the Final Festive Touch
Once the chocolate mint cookies are set, you can drizzle them with a little melted dark chocolate if you like, or simply serve them as is. They offer a wonderful contrast in texture and flavor to the sugar cookies.
These St. Patrick’s Day desserts are not only a feast for the eyes but also a delight for your taste buds. Enjoy the process of creating these festive treats, and more importantly, enjoy sharing them with loved ones. Happy St. Patrick’s Day!
Conclusion:
I hope you’re feeling inspired to whip up some festive magic for your St. Patrick’s Day celebrations! These St. Patrick’s Day desserts are not only a feast for the eyes with their vibrant green hues and charming decorations, but they also offer a delightful explosion of flavor that will have everyone singin extractg your praises. Whether you’re a seasoned baker or just starting out, these recipes are designed to be approachable and incredibly rewarding. Imagin extracte the smiles on your guests’ faces as they indulge in a slice of creamy mint cheesecake or bite into a perfectly spiced Irish soda bread muffin. They are perfect for potlucks, family gatherings, or simply as a special treat to brighten your own day. Don’t be afraid to get creative with your own variations – swap out chocolate chips for white chocolate, add a touch of Irish cream liqueur extract for an adult twist, or experiment with different toppings. So go ahead, embrace the spirit of the holiday and give these St. Patrick’s Day desserts a try. I guarantee you won’t be disappointed!
Frequently Asked Questions:
Q: Can I make these St. Patrick’s Day desserts ahead of time?
A: Absolutely! Many of these desserts, like cupcakes and cookies, can be baked a day or two in advance and stored in airtight containers. Cheesecakes and pies often benefit from chilling overnight, allowing their flavors to meld beautifully. Just be sure to add any delicate decorations, like whipped cream or fresh fruit, closer to serving time to keep them looking their best.
Q: I don’t have green food coloring. Are there natural ways to achieve a green color for my St. Patrick’s Day desserts?
A: You can definitely achieve a lovely green hue naturally! Spinach juice, when blended and strained, can add a subtle green tint without altering the flavor significantly. Matcha powder is another fantastic option, imparting a beautiful jade color and a delicious, earthy flavor. For frosting, avocado can also be blended to create a creamy green base.
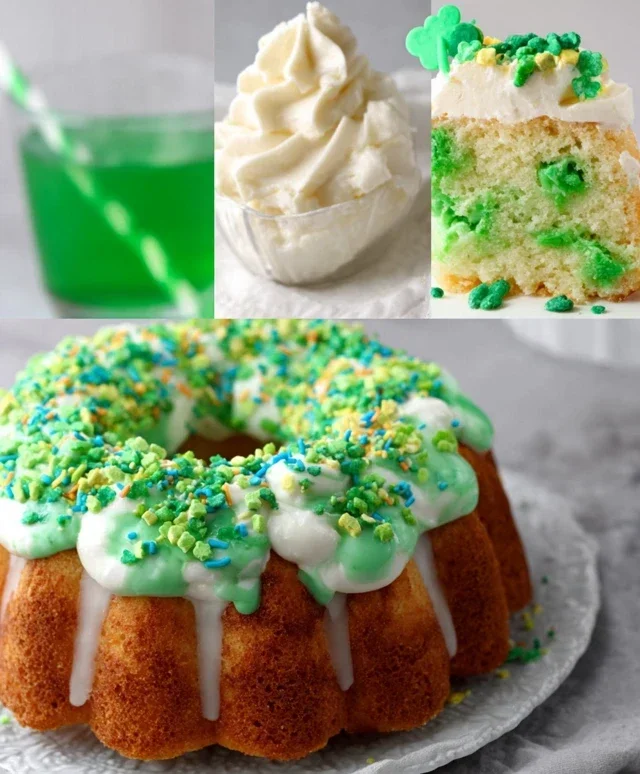
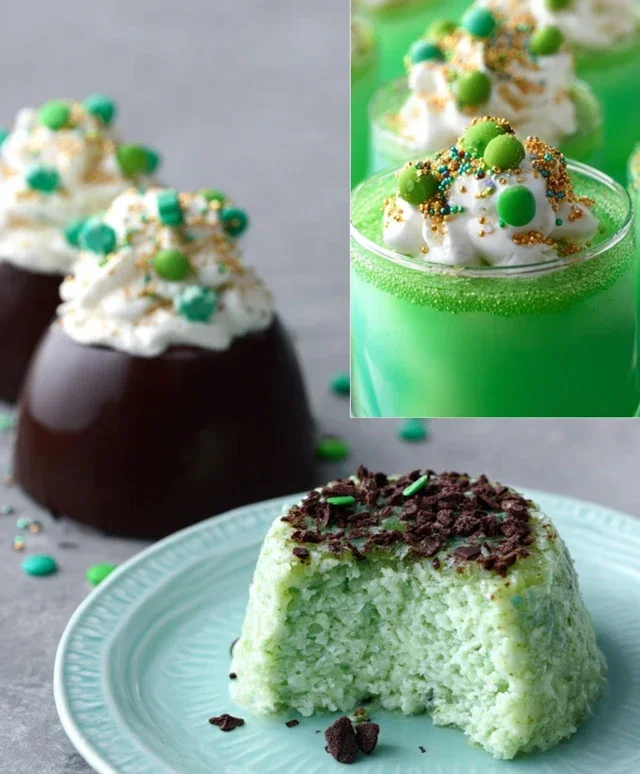
St. Patrick’s Day Dessert Medley
A delightful collection of St. Patrick’s Day-themed desserts, featuring vibrant green colors and classic flavors. This medley offers a sweet conclusion to your festive meal.
Ingredients
-
1 package (8 oz) cream cheese, softened
-
1/2 cup unsalted butter, softened
-
2 cups powdered sugar
-
1 teaspoon vanilla extract
-
Green food coloring
-
1 cup heavy cream
-
1/4 cup sugar
-
1 teaspoon vanilla extract
-
1 box (3.4 oz) instant vanilla pudding mix
-
2 cups milk
-
1 cup crushed green cookies (like mint Oreos)
-
1/2 cup white chocolate chips, melted
-
Green sprinkles
Instructions
-
Step 1
For the green frosting: In a large bowl, beat together softened cream cheese and softened butter until smooth. Gradually add powdered sugar, mixing until well combined. Stir in vanilla extract. Add green food coloring, a few drops at a time, until desired shade is reached. -
Step 2
For the whipped cream: In a separate bowl, whip heavy cream until soft peaks form. Gradually add sugar and vanilla extract, continuing to whip until stiff peaks form. -
Step 3
For the pudding layer: In a medium bowl, whisk together instant vanilla pudding mix and milk until well combined and thickened. Let it set for at least 5 minutes. -
Step 4
Assemble the desserts: In individual serving glasses or a trifle dish, layer the crushed green cookies, the vanilla pudding, and the whipped cream. Repeat layers as desired. -
Step 5
Frost and decorate: Spread the green frosting over the top layer of whipped cream or pudding. Drizzle with melted white chocolate chips and garnish with green sprinkles. -
Step 6
Chill the desserts for at least 30 minutes before serving to allow flavors to meld.
Important Information
Nutrition Facts (Per Serving)
It is important to consider this information as approximate and not to use it as definitive health advice.
Allergy Information
Please check ingredients for potential allergens and consult a health professional if in doubt.