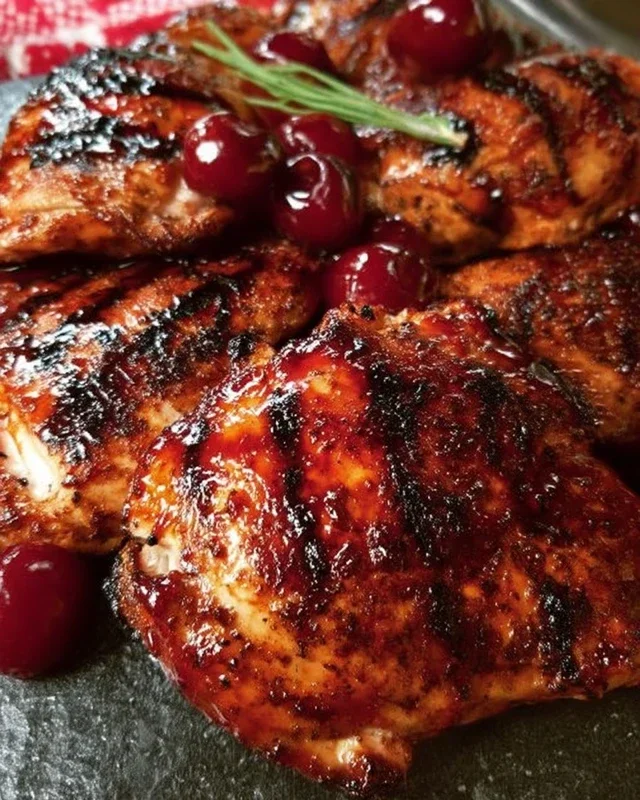
Cherry Dr Pepper Grilled Chicken – Easy Summer Recipe
Cherry Dr. Pepper grilled chicken is about to become your new backyard obsession. There’s something undeniably magical that happens when the sweet, tangy notes of cherry and Dr. Pepper meld with the smoky char of the grill. We’ve all had grilled chicken, but this isn’t just any grilled chicken. It’s a flavor explosion that’s both comforting and exciting, a nostalgic nod to childhood soda fountains with a grown-up, savory twist. The secret lies in a simple, yet genius, marinade that tenderizes the chicken while infusing it with an incredible depth of flavor. Get ready to impress your friends and family with this mouthwatering Cherry Dr. Pepper grilled chicken that’s guaranteed to be a summer staple.
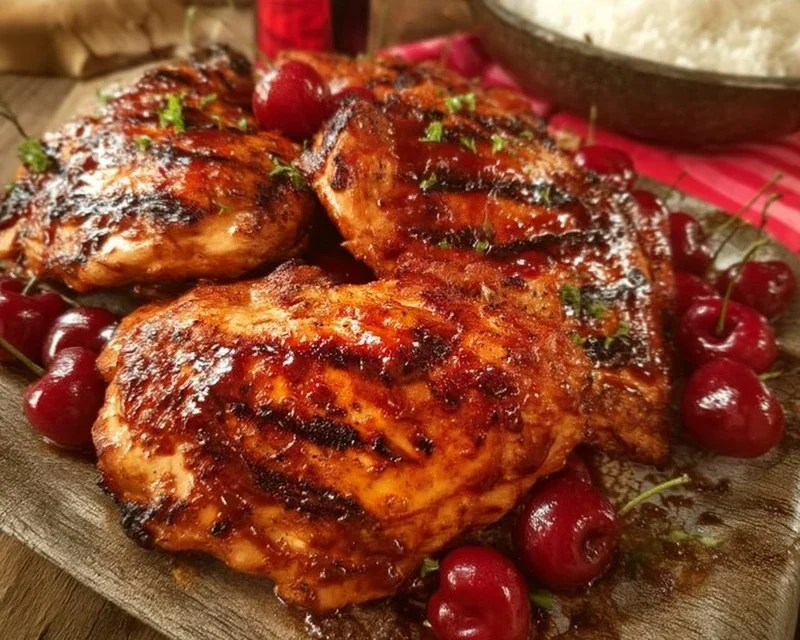
Cherry Dr. Pepper Grilled Chicken
Get ready to tantalize your taste buds with a flavor combination that’s both surprising and incredibly delicious. This Cherry Dr. Pepper Grilled Chicken recipe takes the classic barbecue chicken to a whole new level. The sweetness of the Cherry Dr. Pepper, combined with the tang of ketchup and the savory depth of Worcestershire sauce, creates a glaze that is absolutely irresistible. It’s the perfect dish for your next backyard barbecue, family dinner, or even a casual weeknight meal when you’re craving something special. The unique flavor profile is a guaranteed crowd-pleaser, and the grilling process ensures a beautiful char and juicy, tender chicken. Let’s get started on this culinary adventure!
Ingredients:
Preparing the Marinade and Chicken
The first step to achieving that incredible flavor is to create our signature Cherry Dr. Pepper marinade. In a medium saucepan, combine the Cherry Dr. Pepper, ketchup, tomato paste, brown sugar, Worcestershire sauce, onion powder, black pepper, liquid smoke, chili powder, and minced garlic. Place the saucepan over medium heat. Stir the ingredients frequently as the mixture heats up. We’re aiming to create a smooth, cohesive sauce, and dissolving the brown sugar is key to achieving this. Continue to simmer gently for about 10-15 minutes, stirring occasionally, until the sauce has thickened slightly. This simmering process allows the flavors to meld together beautifully and reduces the sauce to a perfect glaze consistency.
While your marinade is simmering, prepare your chicken. If you’re using a whole chicken cut up, ensure all the pieces are separated and patted dry with paper towels. If you have a package of dark meat chicken pieces, give them a quick rinse and pat them dry. Drying the chicken is an important step; it helps the seasoning adhere better and promotes a nice sear on the grill. Once dried, generously season all sides of the chicken pieces with the seasoning salt and paprika. Make sure to get into all the nooks and crannies. This initial seasoning adds a foundational layer of savory flavor to the chicken before it even meets the glaze.
Marinating the Chicken
Now comes the crucial marinating phase. Once your Cherry Dr. Pepper glaze has simmered and thickened, remove it from the heat and let it cool slightly. You want it warm enough to be pourable but not so hot that it will prematurely cook the chicken. In a large bowl or a resealable plastic bag, place your seasoned chicken pieces. Pour about half of the cooled Cherry Dr. Pepper glaze over the chicken. Ensure each piece is well-coated. Reserve the remaining half of the glaze for basting during the grilling process. Cover the bowl or seal the bag and refrigerate the chicken for at least 2 hours, or ideally, for 4-6 hours. The longer it marinates, the deeper the flavor will penetrate the chicken. This is where the magic truly begin extracts to happen, as the sugars and acids in the glaze start to tenderize and infuse the meat.
Grilling the Chicken
Preheat your grill to medium-high heat. It’s important to have a properly preheated grill to achieve those beautiful grill marks and ensure even cooking. While the grill is heating, prepare your remaining glaze. You can warm it slightly on the stovetop if it has become too thick from sitting.
The Grilling Process
1. Initial Sear: Once the grill is hot, carefully place the marinated chicken pieces onto the grill grates. Avoid overcrowding the grill, as this can lead to uneven cooking and steaming rather than grilling. Allow the chicken to sear undisturbed for about 5-7 minutes per side, depending on the thickness of the pieces. This initial searing will create a delicious crust and lock in the juices. You’ll notice the glaze starting to caramelize on the chicken during this stage.
2. Basting and Cooking: After the initial sear, begin extract basting the chicken liberally with the reserved Cherry Dr. Pepper glaze. Use a good quality basting brush to spread the glaze evenly over all sides of the chicken. Close the grill lid between bastings to help maintain a consistent cooking temperature and allow the chicken to cook through. Continue grilling, turning the chicken every 5-7 minutes and basting frequently, for approximately 20-30 minutes, or until the chicken is cooked through and reaches an internal temperature of 165 degrees Fahrenheit (74 degrees Celsius) at its thickest part. Dark meat chicken can be cooked a little longer for extra tenderness.
3. Monitoring for Doneness: The internal temperature is your best friend here. Use an instant-read meat thermometer to check for doneness. Insert the thermometer into the thickest part of the chicken, avoiding the bone. If you see pink meat or the juices run clear, it’s a good sign, but the thermometer will give you the definitive answer. Be careful not to overcook, as this can lead to dry chicken.
4. Glaze Caramelization and Char: As you continue to grill and baste, pay attention to how the glaze is caramelizing. You’re looking for a sticky, slightly browned exterior. If you notice any areas starting to char too quickly, you can move those pieces to a cooler part of the grill or slightly reduce the heat. The brown sugar in the glaze can burn if the heat is too high for too long. This is where the art of grilling comes in – balancing the heat to get that perfect caramelization without burning.
5. Resting the Chicken: Once the chicken has reached its internal temperature and has a beautiful, glossy glaze, remove it from the grill and place it on a clean platter or cutting board. Tent it loosely with foil and let it rest for 5-10 minutes before serving. This resting period is crucial for allowing the juices to redistribute throughout the chicken, ensuring every bite is moist and flavorful. This final step makes a significant difference in the tenderness and overall enjoyment of the dish.
Serve this delicious Cherry Dr. Pepper Grilled Chicken hot, with any extra glaze spooned over the top. It pairs wonderfully with classic barbecue sides like coleslaw, potato salad, or grilled corn on the cob. Enjoy the explosion of sweet, tangy, and savory flavors!
Conclusion:
I hope you’re as excited to try this Cherry Dr. Pepper Grilled Chicken as I am to share it! This recipe is an absolute winner because it delivers a fantastic blend of sweet, savory, and tangy flavors that are simply irresistible. The carbonation in the Dr. Pepper tenderizes the chicken while the cherry adds a delightful fruity note, creating a truly unique and craveable marinade and glaze. It’s surprisingly easy to make, perfect for weeknight dinners or weekend BBQs, and always a crowd-pleaser. Don’t hesitate to experiment with it; you might just discover your new go-to grilled chicken dish!
Serve this delicious Cherry Dr. Pepper Grilled Chicken with classic BBQ sides like corn on the cob, potato salad, or a fresh green salad. It also pairs wonderfully with rice pilaf or grilled vegetables. For variations, feel free to add a pinch of cayenne pepper to the marinade for a little heat, or incorporate some smoked paprika for an extra layer of smoky flavor.
So, fire up the grill and give this recipe a try. I’m confident you’ll be delighted with the results!
Frequently Asked Questions:
Can I make the marinade ahead of time?
Absolutely! You can prepare the Cherry Dr. Pepper marinade up to 24 hours in advance and store it in an airtight container in the refrigerator. This allows the flavors to meld even further, which can result in an even more delicious chicken.
What kind of chicken is best for this recipe?
This recipe works wonderfully with boneless, skinless chicken breasts or thighs. Thighs tend to stay more moist and flavorful on the grill, but breasts are also a great option. Just adjust your grilling time accordingly to ensure they are cooked through.
Cherry Dr. Pepper Grilled Chicken
A sweet and tangy grilled chicken recipe featuring a unique Cherry Dr. Pepper glaze.
Ingredients
-
1 (12 oz) can Cherry Dr. Pepper
-
1 cup Ketchup
-
1 (6 oz) can Tomato Paste
-
1 cup Brown Sugar
-
1 tablespoon Worcestershire sauce
-
1/2 teaspoon Onion Powder
-
1/2 teaspoon Black Pepper
-
1/2 teaspoon Liquid Smoke
-
1/2 teaspoon Chili Powder
-
1 teaspoon Minced Garlic
-
1 whole chicken cut up OR 1 package of dark meat chicken cut up about 12 pieces of chicken
-
3 teaspoons Seasoning Salt
-
1 teaspoon Paprika
Instructions
-
Step 1
In a medium saucepan, combine Cherry Dr. Pepper, ketchup, tomato paste, brown sugar, Worcestershire sauce, onion powder, black pepper, liquid smoke, chili powder, minced garlic, paprika, and seasoning salt. Stir well to combine. -
Step 2
Bring the mixture to a simmer over medium heat, then reduce heat to low and let it cook for 20-25 minutes, stirring occasionally, until thickened into a glaze. Remove from heat and set aside. -
Step 3
Preheat your grill to medium-high heat. If using charcoal, arrange coals for indirect heat. -
Step 4
Generously season the chicken pieces with additional seasoning salt and paprika, if desired. -
Step 5
Place the chicken pieces on the preheated grill. Grill for approximately 20-25 minutes, turning occasionally, until the chicken is almost cooked through. -
Step 6
During the last 10-15 minutes of grilling, generously brush the chicken with the prepared Cherry Dr. Pepper glaze. Continue to grill, turning and basting, until the chicken is fully cooked and the glaze is caramelized. -
Step 7
Remove chicken from the grill and let it rest for a few minutes before serving.
Important Information
Nutrition Facts (Per Serving)
It is important to consider this information as approximate and not to use it as definitive health advice.
Allergy Information
Please check ingredients for potential allergens and consult a health professional if in doubt.