Easy Chia Seed Pudding- Creamy & Healthy Treat
Chia Seed Pudding Recipe: Get ready to discover your new favorite healthy indulgence! If you’re searching for a breakfast, snack, or dessert that’s as nourishing as it is delicious, look no further. This simple and satisfying chia seed pudding recipe is the answer you’ve been craving. What’s not to love about this creamy, dreamy concoction? People adore it for its incredibly easy preparation – seriously, it takes just minutes to whip up! Plus, its versatility is unmatched; you can customize it with your favorite fruits, nuts, and sweeteners to create endless flavor combinations. This chia seed pudding recipe stands out because it’s packed with fiber, omega-3 fatty acids, and protein, making it a powerhouse of nutrition without sacrificing taste or texture. It’s the perfect guilt-free treat that will keep you feeling energized and satisfied.
Here’s a delicious and easy chia seed pudding recipe for you to try!
Ingredients:
Getting Started: The Simple Science Behind Chia Seed Pudding
Chia seed pudding is one of those magical recipes that requires minimal effort but delivers fantastic results. The “magic” comes from the chia seeds themselves. When these tiny powerhouses are exposed to liquid, they absorb it and swell up, forming a gel-like consistency that is incredibly satisfying and healthy. This pudding is a fantastic source of fiber, omega-3 fatty acids, and protein, making it a perfect breakfast, snack, or even dessert. The best part is its versatility – you can customize the flavors and toppings to suit your taste buds and what you have on hand.
The Preparation Process: Crafting Your Perfect Pudding
This recipe is incredibly straightforward, making it ideal for busy mornings or when you’re craving something wholesome without a lot of fuss. The key is to give the chia seeds enough time to work their magic and absorb the liquid.
1. Combine the Base Ingredients: In a bowl or a jar, begin extract by adding your 3 tablespoons of chia seeds. Next, pour in your 3/4 cup of milk of choice. Whether you opt for creamy coconut milk, neutral almond milk, hearty oat milk, or classic dairy milk, each will contribute a slightly different flavor profile and texture. I personally love using unsweetened almond milk for a lighter option, but full-fat coconut milk adds a decadent richness that’s truly divine.
2. Sweeten and Enhance the Flavor: Now it’s time to add the sweetness and a touch of aromatic flavor. Stir in your 1 tablespoon of maple syrup. If you prefer a less sweet pudding, you can reduce this amount or even omit it entirely, especially if you plan on using very sweet fruits for toppings. Alternatively, you can use other sweeteners like agave nectar, honey, or a pinch of stevia, adjusting the quantity to your preference. Following that, add your 1 teaspoon of vanilla extract. This simple addition really elevates the flavor, adding a warm, comforting note that pairs beautifully with the nutty taste of the chia seeds. Give everything a good stir to ensure the sweetener and vanilla are well distributed.
3. The Crucial Stirring Step: Preventing Clumping: This is arguably the most important step to achieving a smooth, lump-free pudding. After you’ve added all your ingredients and given them an initial stir, let the mixture sit for about 5 minutes. During this time, you’ll notice the chia seeds starting to absorb some liquid and swell. After these 5 minutes, take another fork or whisk and give the mixture a thorough stir. This second stir is critical because it breaks up any clumps of chia seeds that may have started to form at the bottom of your bowl or jar. It ensures that each seed is surrounded by liquid, promoting even thickening. Don’t skip this – a good stir here will make all the difference in your final pudding texture.
4. The Waiting Game: Allowing the Pudding to Set: Once you’ve completed your second stir, cover your bowl or jar with a lid or plastic wrap. Now comes the patient part: let the chia seed pudding chill in the refrigerator for at least 2 to 4 hours. For the absolute best texture, I highly recommend leaving it overnight. This extended resting period allows the chia seeds to fully hydrate and create that signature thick, pudding-like consistency. The longer it sits, the more gelatinous it will become. If you’re in a pinch and need it sooner, you can certainly eat it after a couple of hours, but it might be a bit thinner.
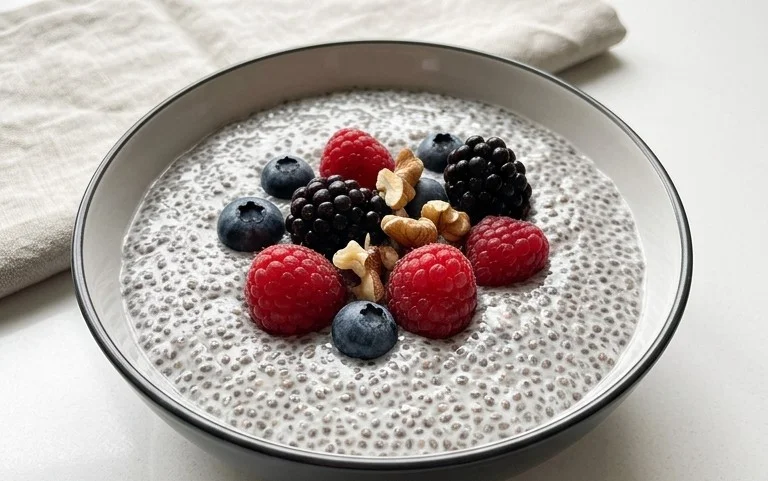
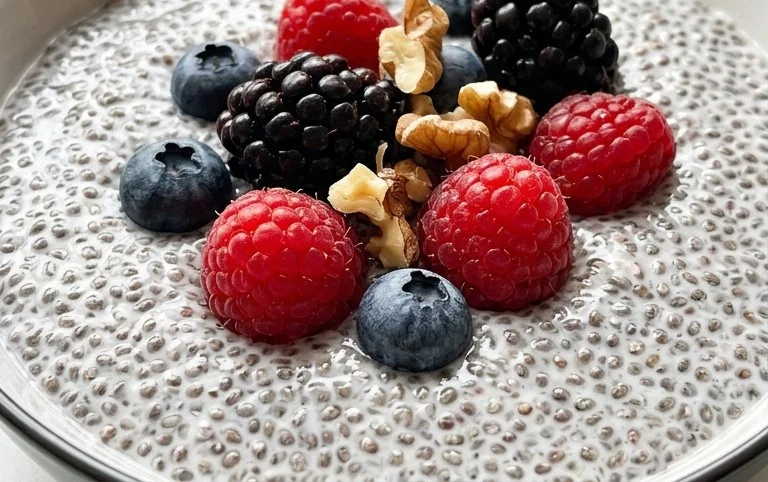
5. Serving and Enjoying Your Creation: After the chilling period, your chia seed pudding should be beautifully thick and creamy. Give it one final stir to ensure it’s uniformly textured. Now comes the fun part: customizing your pudding! You can enjoy it plain, which is delicious in its own right, or you can elevate it with a variety of toppings. Some of my favorite additions include fresh berries (strawberries, blueberries, raspberries), sliced banana, a sprinkle of granola for crunch, a dollop of yogurt, a drizzle of nut butter, or even a sprinkle of shredded coconut. Get creative and experiment with different combinations! This recipe serves as a perfect blank canvas for your culinary imagin extractation.
This simple chia seed pudding recipe is a testament to how basic ingredients can transform into something truly special. It’s a healthy, satisfying, and endlessly adaptable treat that you’ll find yourself making again and again. Enjoy!
Conclusion:
There you have it – a simple yet incredibly rewarding chia seed pudding recipe that’s perfect for busy mornings, healthy snacks, or even a light dessert. This recipe is a true gem because it’s not only ridiculously easy to make with just a few staple ingredients, but it’s also packed with nutrients. Chia seeds are a fantastic source of fiber, omega-3 fatty acids, and protein, making this pudding a guilt-free indulgence that keeps you feeling full and energized. The creamy texture, customizable sweetness, and versatility truly make it a standout.
For serving, I love topping my chia seed pudding with fresh berries, a sprinkle of granola for crunch, a drizzle of honey or maple syrup, or even some toasted nuts. Don’t be afraid to get creative! For variations, consider infusing your base liquid with vanilla extract, a pinch of cinnamon, or even cocoa powder for a chocolatey twist. You can also experiment with different plant-based milks like almond, oat, or coconut milk to alter the flavor profile and creaminess. I truly encourage you to give this delightful recipe a try; it’s a fantastic way to incorporate more wholesome ingredients into your diet without sacrificing flavor or ease.
Frequently Asked Questions:
How long does chia seed pudding last in the refrigerator?
Chia seed pudding is best enjoyed within 3-4 days when stored in an airtight container in the refrigerator. The chia seeds will continue to absorb liquid and thicken over time, so the texture might change slightly with longer storage, but it remains perfectly edible.
Can I make chia seed pudding without a sweetener?
Absolutely! While a touch of sweetener enhances the flavor, you can omit it entirely. The natural sweetness of your milk, or any fruits you add as toppings, can be enough for many people. If you prefer it sweeter, start with a small amount and adjust to your taste.
What kind of liquid can I use for chia seed pudding?
The beauty of this recipe is its flexibility. While dairy milk works, I highly recommend using plant-based alternatives like almond milk, oat milk, coconut milk, or soy milk for a dairy-free option. Each type of milk will impart a slightly different flavor and creaminess, so feel free to experiment!
Chia Seed Pudding
A simple and healthy chia seed pudding recipe that’s perfect for breakfast or a snack.
Ingredients
-
3 tablespoons chia seeds
-
1 tablespoon maple syrup
-
1 teaspoon vanilla
-
3/4 cup milk of choice
-
Pinch of salt
-
Optional: Berries for topping
-
Optional: Nuts for topping
Instructions
-
Step 1
In a bowl or jar, combine the chia seeds, maple syrup, vanilla, and milk. -
Step 2
Add a pinch of salt to enhance the flavors. -
Step 3
Stir the mixture very well to ensure the chia seeds are evenly distributed and to prevent clumping. -
Step 4
Let the mixture sit for 5-10 minutes, then stir again to break up any clumps that may have formed. -
Step 5
Cover the bowl or jar and refrigerate for at least 4 hours, or preferably overnight, until the pudding has thickened. -
Step 6
Serve chilled, topped with your favorite berries or nuts if desired.
Important Information
Nutrition Facts (Per Serving)
It is important to consider this information as approximate and not to use it as definitive health advice.
Allergy Information
Please check ingredients for potential allergens and consult a health professional if in doubt.