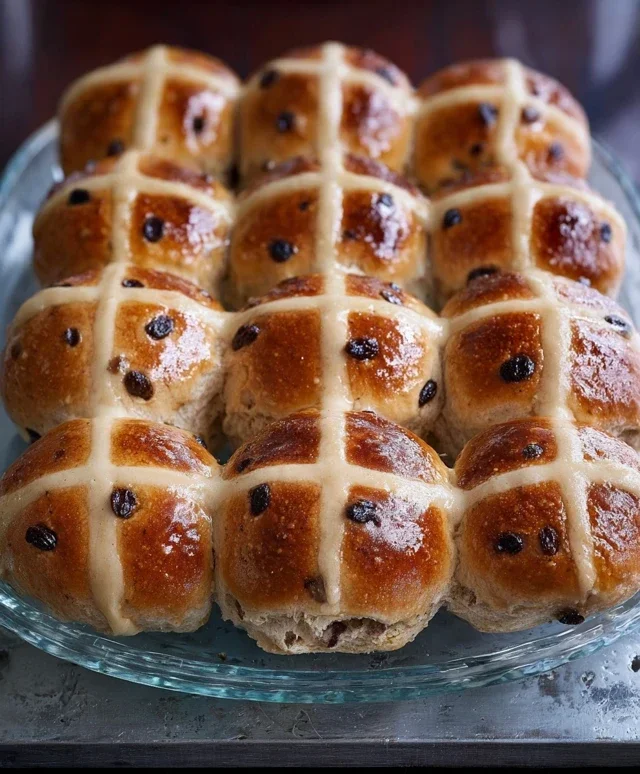
Make Traditional Hot Cross Buns – Easy Recipe
How to Make Traditional Hot Cross Buns are more than just a springtime treat; they’re a warm hug, a nostalgic journey, and a delicious symbol of renewal. For generations, the comforting aroma of spices and the delightful chew of these yeasted buns have signnon-alcoholic aled the arrival of Easter and the joy of the season. What makes them so utterly beloved? It’s that perfect balance of sweet and spice, the plump, juicy raisins or currants nestled within, and of course, the iconic cross gracing their tops. Whether you’re a seasoned baker or embarking on your first culinary adventure, mastering the art of traditional hot cross buns will fill your kitchen with an irresistible fragrance and your heart with a sense of accomplishment. Prepare to impress yourself and your loved ones with this timeless recipe.
How to Make Traditional Hot Cross Buns
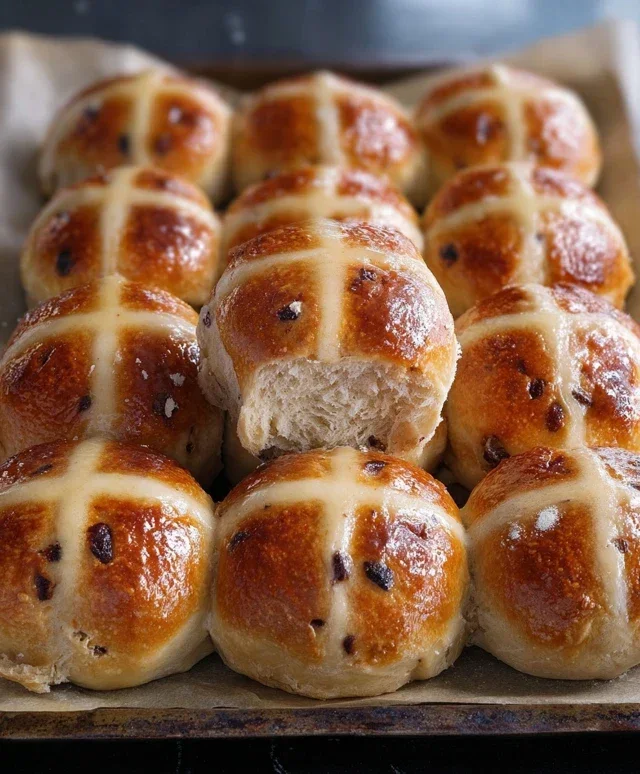
There’s something incredibly comforting and festive about a warm, spiced hot cross bun, especially around Easter. The sweet dough, studded with juicy dried fruit and fragrant with spices, makes them a beloved treat. While they might seem a little intimidating to make from scratch, I promise you, with a little patience and this straightforward guide, you’ll be enjoying your own homemade hot cross buns in no time! Forget the store-bought versions; the aroma that fills your kitchen as these bake is truly magical.
Ingredients:
Instructions:
Step 1: Activating the Yeast and Mixing the Dough Base
Begin extract by gently warming your milk. It should be lukewarm, not hot – think about the temperature you’d use for a baby’s bottle. If it’s too hot, it will kill the yeast, and if it’s too cool, it won’t activate properly. In a large mixing bowl, combine the warmed milk with the instant dried yeast and 4 tablespoons of sugar. Give it a gentle stir, and then let it sit for about 5-10 minutes. You should see a frothy layer form on the surface, which indicates the yeast is alive and active. If you don’t see this, your yeast might be old, or the milk was the wrong temperature, and you’ll need to start again with fresh yeast.
While the yeast is blooming, in a separate bowl, whisk together the 4 cups + 2 tablespoons of all-purpose flour, salt, ground cinnamon, allspice, and ground gin extractger. This dry mixture will form the flavour backbone of our buns. Once the yeast mixture is foamy, add the melted unsalted butter and the beaten room-temperature eggs to it. Whisk everything together until well combined. Now, gradually add the dry flour mixture to the wet ingredients. Start mixing with a wooden spoon or a spatula until a shaggy dough begin extracts to form. At this point, it’s a good idea to add your dried currants or raisins. Ensure they are evenly distributed throughout the dough.
Step 2: Kneading the Dough to Develop Gluten
Once the dough is too stiff to mix with a spoon, it’s time to get your hands dirty! Lightly flour your work surface and turn the dough out. Knead the dough for about 8-10 minutes. Kneading is crucial for developing the gluten in the flour, which gives the buns their characteristic chewy texture and allows them to rise. You’ll know you’ve kneaded enough when the dough becomes smooth, elastic, and bounces back slowly when you press it with your finger. If the dough feels too sticky, add a little more flour, a tablespoon at a time, but be careful not to add too much, as this can result in dry buns. Conversely, if it feels too dry, you can wet your hands slightly and continue kneading.
After kneading, shape the dough into a ball and place it in a lightly greased bowl. Turn the dough over so the top is also greased, which prevents it from drying out. Cover the bowl with a clean kitchen towel or plastic wrap and leave it in a warm place to rise for about 1 to 1.5 hours, or until it has doubled in size. A slightly warm oven (turned off!) or a sunny windowsill are ideal spots.
Step 3: Shaping the Hot Cross Buns
Once the dough has beautifully doubled, gently punch it down to release the air. Turn the dough out onto your lightly floured surface again and knead it for another minute or two. Now, divide the dough into 12 equal portions. You can do this by eye, or for extra precision, use a kitchen scnon-alcoholic ale to weigh each portion. Roll each portion into a smooth, round ball. Place the dough balls onto a baking sheet lined with parchment paper, leaving a little space between each one as they will expand further. You can place them close together if you prefer them to bake into each other for a softer side.
Step 4: The Cross and Final Rise
For the cross topping, whisk together the ⅓ cup of all-purpose flour, 2 tablespoons of sugar, and enough warm water to create a smooth, thick paste. You want a consistency that is thick enough to pipe without running, but still fluid. Transfer this paste to a piping bag fitted with a small round tip, or you can use a small plastic bag with a corner snipped off. Carefully pipe a cross onto the top of each bun. Don’t worry if your crosses aren’t perfect; they’ll still taste delicious!
After piping the crosses, cover the buns loosely with a clean kitchen towel and let them rest for another 20-30 minutes. This second rise, often called proofing, allows the buns to become light and airy before baking. While they are proofing, preheat your oven to 400 °F (200 °C).
Step 5: Baking and Glazing for That Perfect Finish
Once the buns have puffed up slightly and the oven is preheated, it’s time to bake! Place the baking sheet into the preheated oven and bake for 15-20 minutes, or until the buns are golden brown and sound hollow when tapped on the bottom. Keep an eye on them to prevent them from burning.
While the buns are still warm from the oven, it’s time for the final touch: a glaze. In a small bowl, whisk together the 2 tablespoons of powdered sugar with a tiny splash of warm water or milk until you have a smooth, thin glaze. Using a pastry brush, gently brush this glaze all over the tops of the hot cross buns. The warmth of the buns will help the glaze melt slightly and give them a lovely sheen.
Allow the buns to cool on a wire rack for a few minutes before serving. They are absolutely divine served warm with a generous slather of butter. Enjoy the fruits of your labour – these homemade hot cross buns are a true delight!
Conclusion:
There you have it! Making traditional hot cross buns from scratch is a rewarding culinary journey that fills your home with the most delightful aromas of spice and warmth. The process, while requiring a little patience, yields incredibly fluffy, lightly spiced buns studded with juicy dried fruit, and topped with that iconic crosses. These aren’t just any buns; they’re a taste of tradition and a perfect centerpiece for your Easter celebrations or any time you crave a comforting, homemade treat. Don’t be intimidated by the yeast; this recipe breaks it down clearly. I encourage you to give it a try!
Serve these delightful hot cross buns warm, fresh from the oven, with a generous slathering of butter, or even a drizzle of honey. They’re also fantastic toasted for breakfast or enjoyed with a cup of tea as an afternoon pick-me-up. For a twist, consider adding a pinch of ground gin extractger or nutmeg to the dough, or swapping some of the dried fruit for candied peel. Experimenting is part of the fun!
Frequently Asked Questions:
Why are my hot cross buns not fluffy?
This is often due to overworking the dough, insufficient proving time, or an inactive yeast. Ensure your yeast is fresh and active by proofing it in warm liquid before adding it to the flour. Let the dough rise in a warm place until it has doubled in size. Gentle handling during shaping is also key to retaining that lovely airiness.
Can I make the crosses ahead of time?
While the crosses are traditionally piped on before baking, you can prepare the paste mixture a day in advance and store it in an airtight container in the refrigerator. Just ensure it’s at room temperature and smooth before piping.
How do I store leftover hot cross buns?
Once completely cooled, store your hot cross buns in an airtight container at room temperature for up to 2-3 days. For longer storage, you can freeze them. Wrap them tightly in plastic wrap and then in foil. Reheat gently in the oven or microwave when ready to enjoy.
Traditional Hot Cross Buns
A classic recipe for soft, spiced hot cross buns with plump dried fruit, perfect for Easter.
Ingredients
-
1 cup (236 ml milk) warmed to 100– 115 °F (38 – 46°C)
-
2 teaspoons instant dried yeast
-
4 tablespoons sugar
-
4 cups + 2 tablespoons (525 grams) all-purpose/plain flour
-
1 teaspoon salt
-
1 teaspoon ground cinnamon
-
1 teaspoon allspice
-
¼ teaspoon ground ginger
-
1 cup (150 grams) dried currants or raisins
-
6 tablespoons unsalted butter (melted)
-
2 large eggs beaten (room temperature)
-
⅓ cup (46 grams) all-purpose/plain flour
-
2 tablespoons sugar
-
Warm water
-
2 tablespoons powdered/confectioners sugar
Instructions
-
Step 1
In a large bowl, combine the warmed milk, yeast, and 1 tablespoon of the sugar. Let stand for 5-10 minutes until frothy. -
Step 2
Add the remaining 3 tablespoons of sugar, flour, salt, cinnamon, allspice, and ginger to the yeast mixture. Mix until a shaggy dough forms. -
Step 3
Turn the dough out onto a lightly floured surface and knead for 8-10 minutes until smooth and elastic. Incorporate the dried currants or raisins during the last few minutes of kneading. -
Step 4
Place the dough in a lightly greased bowl, cover, and let rise in a warm place for 1-1.5 hours, or until doubled in size. -
Step 5
Punch down the dough, divide into 12 equal pieces, and shape each into a round bun. Place on a greased baking sheet, cover, and let rise for another 30 minutes. -
Step 6
Preheat oven to 375°F (190°C). Bake the buns for 15-20 minutes until golden brown. -
Step 7
For the cross: Whisk together the ⅓ cup flour, 2 tablespoons sugar, and a little warm water until a smooth paste forms. Pipe crosses onto the cooled buns. -
Step 8
For the glaze: Whisk together the 2 tablespoons powdered sugar with a tablespoon or two of warm water until smooth. Brush over the warm buns.
Important Information
Nutrition Facts (Per Serving)
It is important to consider this information as approximate and not to use it as definitive health advice.
Allergy Information
Please check ingredients for potential allergens and consult a health professional if in doubt.