Peanut Butter Cup Chocolate Roll Cake-Decadent Treat
Peanut Butter Cup Chocolate Roll Cake is a dream come true for any dessert lover, and trust me, it’s even better than it sounds! We all have those childhood favorites, those comforting flavors that instantly transport us back to simpler times. For me, it’s that perfect salty-sweet combination of peanut butter and chocolate, a classic duo that can do no wrong. This Peanut Butter Cup Chocolate Roll Cake takes that beloved pairing and elevates it into something truly spectacular. Imagin extracte a light, airy chocolate sponge cake rolled around a creamy, dreamy peanut butter filling, all swirled together to create a visually stunning and incredibly delicious treat. It’s the ultimate indulgence, a guaranteed crowd-pleaser that will have everyone beggin extractg for the recipe. What makes this particular Peanut Butter Cup Chocolate Roll Cake so special is its perfect balance – it’s rich without being too heavy, and the textures play off each other beautifully. Get ready to impress yourself and everyone you know!
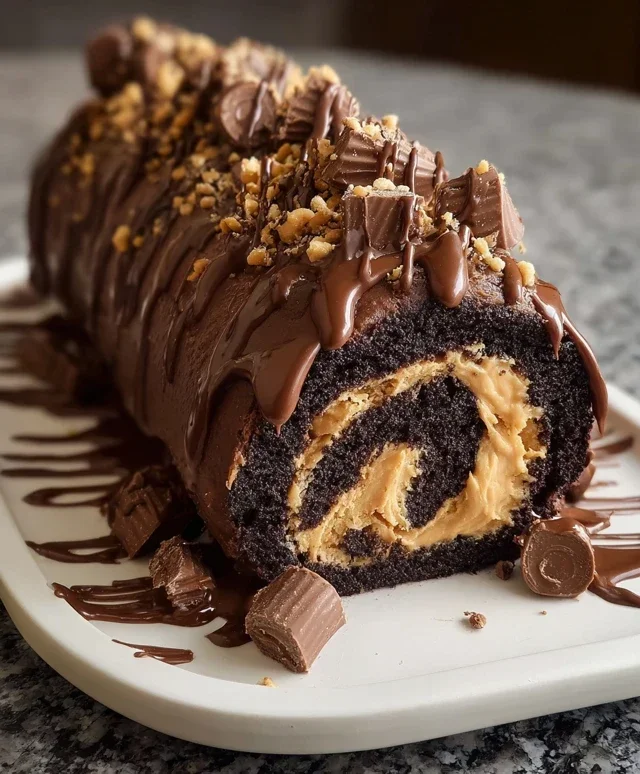
Peanut Butter Cup Chocolate Roll Cake
Get ready to impress your friends and family with this show-stopping Peanut Butter Cup Chocolate Roll Cake! This dessert is a delightful combination of rich chocolate, creamy peanut butter, and a light, airy sponge cake that’s surprisingly easy to make. The secret to its success lies in a perfectly baked chocolate sponge and a luscious peanut butter cream filling. It looks sophisticated, but trust me, it’s perfectly achievable for home bakers.
Ingredients:
Instructions:
Preparing the Chocolate Sponge Cake
1. Preheat and Prepare Your Pan: Start by preheating your oven to 350°F (175°C). Line a 10×15 inch jelly roll pan with parchment paper, making sure to let the paper overhang the sides. This overhang will be super helpful when you’re rolling the cake later. Grease the parchment paper lightly and then dust it with a little cocoa powder. This ensures your delicate chocolate cake won’t stick and gives it a nice finish.
2. Whip Up the Egg Mixture: In a large bowl, whisk together the 4 large eggs and 1/2 cup of granulated sugar. I like to do this with an electric mixer on medium-high speed. Beat them until the mixture is pnon-alcoholic ale, thick, and forms ribbons when you lift the beaters. This process, called “ribbon stage,” incorporates air into the eggs, which is crucial for a light and fluffy cake. It might take about 5-7 minutes.
3. Combine the Dry Ingredients: In a separate medium bowl, whisk together the 1 cup of all-purpose flour, 1/2 cup of unsweetened cocoa powder, 1/2 teaspoon of baking powder, and 1/4 teaspoon of salt. Sifting these dry ingredients together helps to remove any lumps and aerate them, ensuring they blend seamlessly into the egg mixture without overmixing.
4. Gently Fold and Bake: Now, it’s time to combine the wet and dry ingredients. Sift about one-third of the dry ingredients over the egg mixture and gently fold it in with a spatula. Be careful not to overmix here; you want to preserve all that lovely air you whipped into the eggs. Continue adding the dry ingredients in two more additions, folding gently after each. Once just combined, pour the batter evenly into your prepared jelly roll pan. Spread it out gently to ensure an even layer. Bake for 12-15 minutes, or until the cake springs back when lightly touched. Don’t overbake, or it will crack when you roll it!
Making the Peanut Butter Cream Filling
5. Whip the Cream and Peanut Butter: While the cake is baking, let’s get started on the luscious peanut butter filling. In a medium bowl, combine the 1/2 cup of smooth peanut butter with 1/2 cup of heavy cream. Beat this mixture with an electric mixer until it’s smooth and well combined. Then, gradually add the 1 cup of powdered sugar, continuing to beat until the frosting is light and fluffy. You want a consistency that’s spreadable but firm enough to hold its shape. If it seems a bit too stiff, you can add a tiny splash more cream; if it’s too loose, add a tablespoon more powdered sugar.
Assembling and Rolling the Cake
6. Cool and Fill: Once the cake is baked, immediately invert it onto a clean kitchen towel that has been generously dusted with powdered sugar. Carefully peel off the parchment paper. Let the cake cool on the towel for about 5-10 minutes. It should still be warm, which makes it pliable for rolling. While it’s still warm, gently spread the peanut butter cream filling evenly over the surface of the cake, leaving a small border around the edges. Sprinkle the chopped mini peanut butter cups over the filling.
7. The Roll and Chill: Starting from one of the shorter ends, use the towel to help you carefully roll up the cake. Roll it snugly but not so tightly that it cracks. Once rolled, place the cake seam-side down on a serving platter. If it seems a little unstable, you can wrap it loosely in plastic wrap to help it hold its shape. Refrigerate the cake for at least 1 hour, or until the filling is set and the cake is firm. This chilling time is crucial for the cake to set properly and for the flavors to meld.
8. Finishing Touches: Before serving, you can dust the top of the roll cake with a little extra powdered sugar for a beautiful finish. Slice it into thick pieces with a sharp knife, and prepare for the applause! This Peanut Butter Cup Chocolate Roll Cake is a guaranteed crowd-pleaser, perfect for birthdays, holidays, or just a special treat. Enjoy every decadent bite!
Conclusion:
There you have it! This Peanut Butter Cup Chocolate Roll Cake is a truly showstopping dessert that’s surprisingly achievable for home bakers. Its moist chocolate sponge, decadent peanut butter frosting, and iconic chocolate cup topping create a flavor combination that’s utterly irresistible. It’s the perfect treat for birthdays, holidays, or just when you’re craving something incredibly delicious and satisfying. Don’t be intimidated by the rolling aspect; a little patience goes a long way, and the end result is well worth the effort. I highly encourage you to give this recipe a try – I promise your taste buds will thank you!
This cake is fantastic on its own, but it also pairs beautifully with a cold glass of milk or a scoop of vanilla ice cream. For a fun twist, consider adding a sprinkle of chopped roasted peanuts on top of the frosting before adding the chocolate cups, or even swirling in a bit of extra peanut butter into the frosting for an even more intense peanut butter flavor. You could also experiment with different types of chocolate for the topping, like dark or milk chocolate chips melted and drizzled over the top.
Frequently Asked Questions:
Can I make this Peanut Butter Cup Chocolate Roll Cake ahead of time?
Yes, absolutely! You can bake the chocolate sponge and let it cool completely. The peanut butter frosting can also be made and stored in an airtight container in the refrigerator for up to 2 days. Once everything is cooled and the frosting is ready, you can assemble and roll the cake a few hours before serving. Chilling the assembled cake for at least 30 minutes will help it set and make slicing easier.
My chocolate sponge is cracking when I roll it. What am I doing wrong?
A little cracking is often normal, especially with roll cakes. However, to minimize it, ensure your sponge is baked just until it springs back to the touch and isn’t overdone. Also, make sure to invert it onto a clean kitchen towel dusted with cocoa powder or powdered sugar immediately after baking. Let it cool completely on the towel, which helps keep it pliable. Don’t rush the rolling process; take your time, and if a small crack appears, the frosting will do a great job of hiding it!
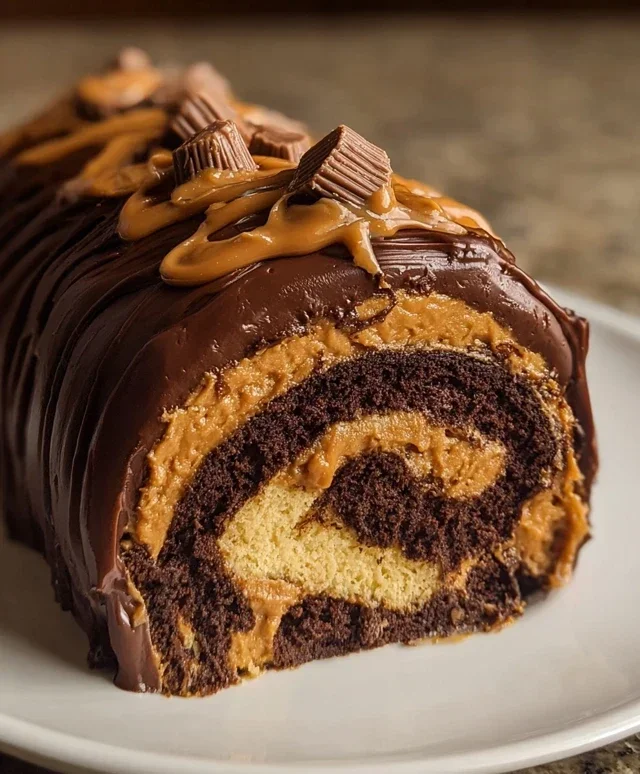
Peanut Butter Cup Chocolate Roll Cake
A decadent chocolate cake rolled with a creamy peanut butter filling, studded with chopped peanut butter cups.
Ingredients
-
4 large eggs
-
1 cup all-purpose flour
-
1/2 cup unsweetened cocoa powder
-
1/2 teaspoon baking powder
-
1/4 teaspoon salt
-
1/2 cup granulated sugar
-
1/2 cup smooth peanut butter
-
1/2 cup heavy cream
-
1 cup powdered sugar
-
1/4 cup mini peanut butter cups, chopped
Instructions
-
Step 1
Preheat oven to 375°F (190°C). Line a 10×15 inch jelly roll pan with parchment paper and lightly grease. -
Step 2
In a medium bowl, whisk together flour, cocoa powder, baking powder, and salt. Set aside. -
Step 3
In a large bowl, beat eggs and granulated sugar until pale and thick, about 5 minutes. -
Step 4
Gently fold the dry ingredients into the egg mixture until just combined. Spread batter evenly into the prepared pan. -
Step 5
Bake for 12-15 minutes, or until a toothpick inserted into the center comes out clean. Immediately invert the cake onto a clean kitchen towel dusted with powdered sugar. Peel off parchment paper. Roll up the cake and towel together and let cool completely. -
Step 6
In a separate bowl, beat together smooth peanut butter, heavy cream, and 1 cup powdered sugar until smooth and creamy. -
Step 7
Unroll the cooled cake. Spread the peanut butter filling evenly over the cake, then sprinkle with chopped mini peanut butter cups. Roll the cake up tightly without the towel. -
Step 8
Chill the rolled cake for at least 30 minutes before slicing and serving.
Important Information
Nutrition Facts (Per Serving)
It is important to consider this information as approximate and not to use it as definitive health advice.
Allergy Information
Please check ingredients for potential allergens and consult a health professional if in doubt.