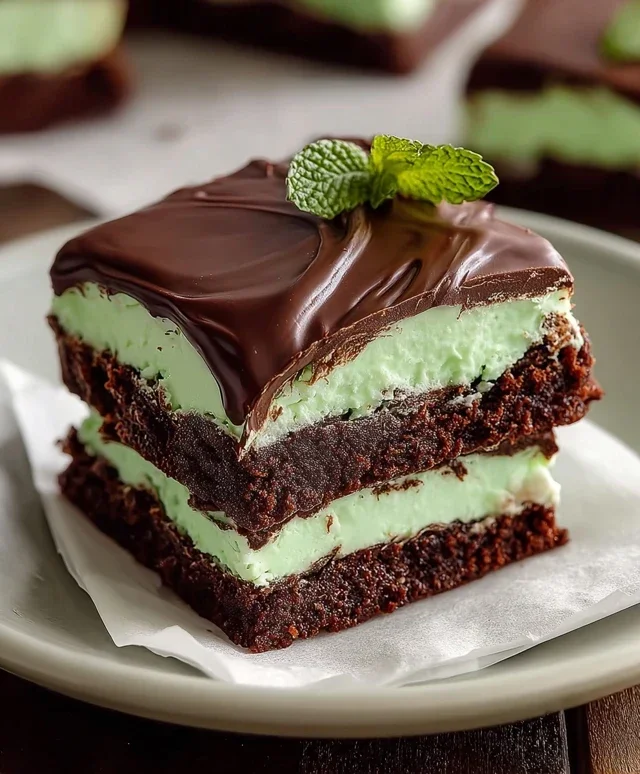
Triple-layer Chocolate Mint Squares-Decadent Treat
Triple-layer chocolate mint squares are the stuff of pure dessert dreams, and I’m so excited to share this recipe with you! If you, like me, have a serious soft spot for the classic combination of rich chocolate and invigorating mint, then these decadent treats are about to become your new obsession. They’re not just another brownie; they’re an experience. Imagin extracte a luscious, fudgy chocolate base, crowned with a silky smooth mint-infused cream cheese layer, and finally topped with a glistening, intense dark chocolate ganache. It’s this incredible symphony of textures and flavors that makes triple-layer chocolate mint squares so utterly irresistible. Perfect for parties, holidays, or just when you need a serious pick-me-up, these squares offer an elevated take on a beloved classic that will have everyone beggin extractg for the recipe.
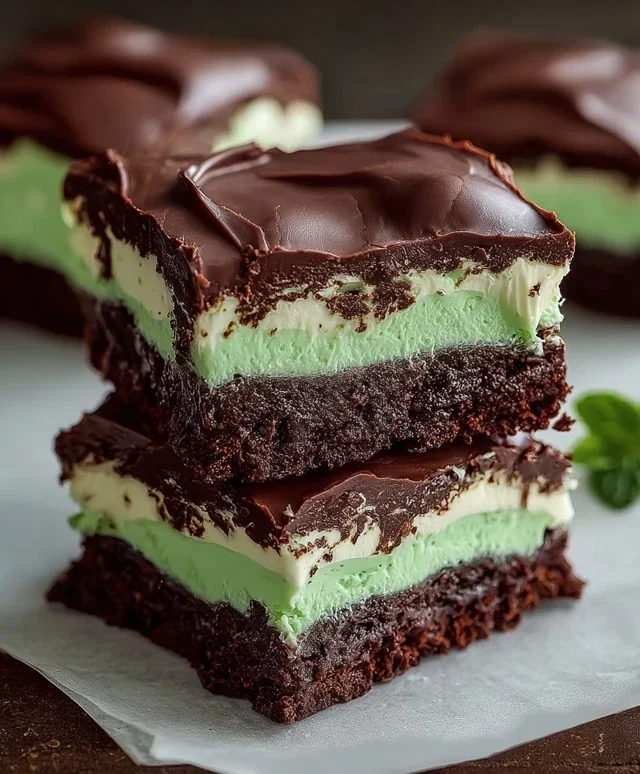
Triple-Layer Chocolate Mint Squares
Get ready to indulge in a dessert masterpiece that’s as stunning to look at as it is delicious to eat. These Triple-Layer Chocolate Mint Squares are a symphony of rich chocolate, creamy mint, and a delightful cookie base, all baked into perfectly portioned squares. They’re perfect for holidays, celebrations, or simply when you need a serious chocolate and mint fix. The layers are distinct yet meld beautifully with each bite, offering a satisfying contrast in textures and flavors. While they might seem impressive, with a little patience and attention to detail, you can absolutely recreate this decadent treat in your own kitchen. Let’s dive in!
Ingredients:
The Decadent Base Layer
Our journey begin extracts with creating the rich, chocolatey base that forms the foundation of these glorious squares. This layer is a bit like a fudgy brownie but with a slightly firmer texture, designed to hold up beautifully under the subsequent layers.
1. Preheat your oven to 350°F (175°C). Grease and flour a 9×13 inch baking pan, or line it with parchment paper, leaving an overhang on the sides for easy lifting later. This initial preparation is crucial for ensuring your squares release cleanly from the pan once baked and cooled. In a medium saucepan over low heat, melt 1 cup of salted butter and 4 oz. of semi-sweet chocolate chips. Stir constantly until the chocolate is completely melted and the mixture is smooth and glossy. It’s important to keep the heat low to prevent scorching the chocolate. Once melted, remove the saucepan from the heat.
2. To the melted chocolate and butter mixture, whisk in 2 cups of granulated sugar and 2 teaspoons of vanilla extract until well combined. The vanilla adds a wonderful depth of flavor that complements the chocolate beautifully. Next, gradually beat in 4 large eggs, one at a time, ensuring each egg is fully incorporated before adding the next. This gradual addition helps create a smooth, emulsified batter. Finally, gently fold in 1 ½ cups of all-purpose flour until just combined. Be careful not to overmix the flour, as this can lead to a tough base. The batter should be thick and rich.
3. Pour the batter evenly into the prepared baking pan. Use a spatula to spread it to the edges, ensuring an even layer. Bake for 25-30 minutes, or until a toothpick inserted into the center comes out with moist crum extractbs attached, but not wet batter. It’s important not to overbake this layer, as it will continue to cook slightly as it cools and needs to remain wonderfully fudgy. Once baked, remove the pan from the oven and let it cool completely on a wire rack. Patience here is key; attempting to add the next layer while the base is warm can lead to a messy, melty situation.
The Creamy Mint Layer
Now, for the vibrant and refreshing mint layer that makes these squares truly special. This is where our vibrant green hue and cool mint flavor come into play.
1. While the chocolate base is cooling, prepare the mint filling. In a large bowl, cream together ¾ cup of softened salted butter with 3 cups of powdered sugar until light and fluffy. You can use an electric mixer for this step, which will make it much easier and faster to achieve a smooth consistency. Gradually add the powdered sugar to the softened butter, starting on low speed to prevent a cloud of sugar from erupting, then increasing to medium-high speed.
2. Once the butter and powdered sugar are well combined, add 1 tablespoon of heavy whipping cream and 1 teaspoon of peppermint extract. Mix until the filling is smooth and creamy. Now comes the fun part: add 10 drops of green food coloring. Start with fewer drops and add more until you achieve your desired vibrant minty green color. The food coloring is purely for aesthetics, but it really enhances the minty appeal. Once the color is perfect, spread this creamy mint layer evenly over the cooled chocolate base. Use an offset spatula or the back of a spoon to ensure a smooth, uniform surface.
The Glossy Chocolate Ganache Topping
The final layer is a simple yet elegant chocolate ganache that adds a beautiful glossy finish and another hit of rich chocolate flavor.
1. To make the ganache, combine 3 cups of semi-sweet chocolate chips and 2 tablespoons of butter in a heatproof bowl. In a small saucepan, heat ½ cup of heavy whipping cream over medium heat until it just begin extracts to simmer around the edges. Do not let it boil. Pour the hot cream over the chocolate chips and butter. Let it sit undisturbed for 5 minutes to allow the heat to melt the chocolate.
2. After 5 minutes, gently whisk the mixture starting from the center and working your way outwards until the ganache is completely smooth, glossy, and homogenous. This may take a minute or two of gentle stirring. If there are any stubborn unmelted chocolate bits, you can place the bowl over a bain-marie (a bowl set over a pot of simmering water, ensuring the bottom of the bowl doesn’t touch the water) for a very short time, stirring constantly, until smooth. Once smooth, pour the ganache over the mint layer, spreading it carefully with an offset spatula to cover the entire surface. You want a nice, even sheen.
3. Allow the ganache to set at room temperature for at least 30 minutes to an hour, or until it’s firm to the touch but not hard. For cleaner cuts, you can then refrigerate the pan for about 1-2 hours, or until the ganache is fully set. Once the squares are set, use the parchment paper overhang to lift the entire block out of the pan. Place it on a cutting board and use a sharp knife, wiped clean between each cut, to slice into 16 or 24 squares, depending on your desired size. Enjoy your stunning, triple-layered chocolate mint creations!
Conclusion:
And there you have it – a recipe for truly decadent Triple-layer Chocolate Mint Squares that are sure to impress! This recipe is a winner because it strikes the perfect balance between rich, fudgy chocolate and refreshing mint, all presented in a visually appealing, layered format. The contrasting textures, from the crum extractbly crust to the smooth ganache, make each bite an adventure. They are incredibly versatile, perfect for a sophisticated dessert at a dinner party, a delightful treat for a bake snon-alcoholic ale, or simply a way to satisfy a serious chocolate craving. Don’t be intimidated by the layers; each step is straightforward and rewarding. I highly encourage you to give these Triple-layer Chocolate Mint Squares a try – you won’t regret it!
Serving Suggestions:
These squares are delightful on their own, but can be elevated further. Consider serving them chilled, perhaps with a dollop of whipped cream or a dusting of cocoa powder for an extra touch of elegance. A small glass of milk or a strong coffee also pairs wonderfully, complementing the rich chocolate flavors.
Variations to Explore:
Feel free to experiment with the mint extract – a touch more or less can alter the intensity. For a different crust, try using crushed grabeef ham crackers or even shortbread cookies. You could also swirl a little extra mint into the top ganache layer before it sets for an even more pronounced minty kick.
Frequently Asked Questions:
Q: Can I make these ahead of time?
Absolutely! These Triple-layer Chocolate Mint Squares are best made at least a few hours, or even a day, in advance. This allows the layers to firm up properly, making them easier to cut and ensuring the flavors meld beautifully.
Q: How long do these squares keep?
Stored in an airtight container in the refrigerator, these chocolate mint delights will stay fresh and delicious for up to a week. They are a great make-ahead option for parties or to have on hand for unexpected guests.
Triple-Layer Chocolate Mint Squares
Decadent chocolate mint squares with three distinct layers for a delightful treat.
Ingredients
-
1 cup salted butter
-
4 oz. semi-sweet chocolate chips
-
2 cups granulated sugar
-
2 teaspoons vanilla extract
-
1 ½ cups all-purpose flour
-
4 large eggs
-
¾ cup salted butter, softened
-
3 cups powdered sugar
-
1 tablespoon heavy whipping cream
-
1 teaspoon peppermint extract
-
10 drops green food coloring
-
3 cups semi-sweet chocolate chips
-
2 tablespoons butter
-
½ cup heavy whipping cream
Instructions
-
Step 1
Preheat oven to 350°F (175°C). Grease and flour a 9×13 inch baking pan. -
Step 2
In a medium saucepan, melt 1 cup salted butter and 4 oz. semi-sweet chocolate chips over low heat. Stir until smooth. Remove from heat and stir in 2 cups granulated sugar and 2 teaspoons vanilla extract. Beat in 1 ½ cups all-purpose flour and 4 large eggs until just combined. Spread evenly into the prepared baking pan. -
Step 3
Bake for 20 minutes. Let cool slightly. In a medium bowl, beat ¾ cup softened salted butter with 3 cups powdered sugar until smooth. Add 1 tablespoon heavy whipping cream, 1 teaspoon peppermint extract, and 10 drops green food coloring. Beat until fluffy and spread evenly over the baked layer. -
Step 4
In a small saucepan, melt 3 cups semi-sweet chocolate chips and 2 tablespoons butter over low heat, stirring until smooth. Stir in ½ cup heavy whipping cream until combined. Pour over the green mint layer. Chill for at least 30 minutes, or until firm. Cut into squares. -
Step 5
Allow to set completely before cutting into squares for serving.
Important Information
Nutrition Facts (Per Serving)
It is important to consider this information as approximate and not to use it as definitive health advice.
Allergy Information
Please check ingredients for potential allergens and consult a health professional if in doubt.